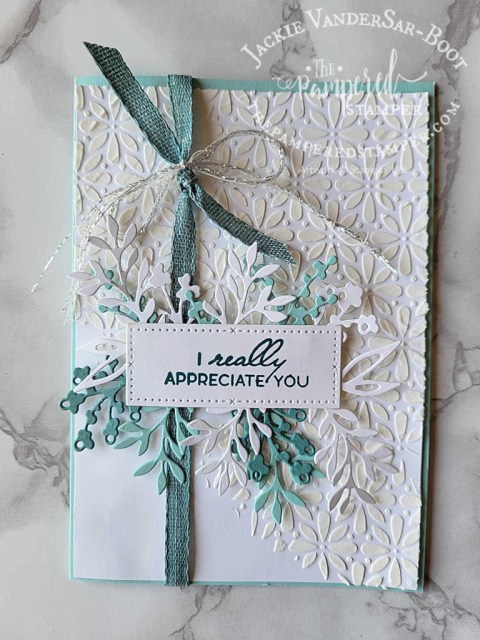
Hello stampers and happy Monday to you. If you follow me on YouTube then you already know that I have been having a lot of fun with embossing paste. In fact, my container is almost empty! The last trick I want to do with it is to tint it with re-inkers. In the meantime, here are two cards that I made with embossing paste. The first one was in my Sweet Suite Tuesday video. Since embossing paste takes a few hours to dry completely, I needed to have an extra one on hand to be able to finish my card during the video.
An Extra Piece for Inspiration
I had the lovely problem of having an extra piece of embossing paste background. If you look closely at the next card you will see that has the same pattern but I turned it sideways. The open space left just enough room to stamp the sentiment. Don’t you think that it makes a very lovely sympathy card?
Here you can see the closeup of this lovely card. Do you see the ribbon? It is frayed because I ripped off the one side to make the pretty bow on the pool party card in this post. You will see how I did it in the video tutorial.
Embossing Paste with the Truck Bundle
A week or so ago I made a trio of cards using the Trucking Along bundle. You can see those cards here.
Video Tutorial
Here is the video tutorial for the embossing paste background card. Maybe you will be inspired to try something new when you see how easy it is.
Curious about the “patterned paper”?
Actually, it isn’t patterned paper, it is a background stamp set called Berry Harvest. I tried colouring it with various combinations of Blends and I made a handy little chart to show you the results. Which colour combination is your favourite?
It was a lot of fun to play with the different colour combinations. There is still one stamped image waiting for me. It is stamped in Stazon so that I can colour it with blender pens and watercolor pencils. Stay tuned for when I finish playing with that.
Thanks for joining me today on my blog. If you don’t already have a Stampin’Up! demonstrator, I would love to be yours if you live in Canada or Europe. Just click on the links below to shop with me in Canada or click here if you live in Europe.
Hello stampers and happy Thursday to you. Today I am sharing a gorgeously vibrant Tropical Leaf card. There are so many great watercolour tips to be gleaned from my video tutorial. Many thanks to Tami Hewlett for sharing her gorgeous card that inspired me! I hope that I inspire YOU to try this fun card!!
Tropical Leaf Bundle Card
If you want to enjoy a blast from the past, consider checking out this blog post from 2020 where I watercolour adorable rainboots.
Five Watercolour Tips and Tricks
Use either Fluid 100 watercolour paper from Stampin’Up! OR the retired Shimmery White cardstock for your background and your leaves.
Ink your leaves with three shades of green starting with the lightest shade. Spritz lightly with water and tilt your stamp so the colours run together a bit.
For the background ink up your E. block in Azure Afternoon and Tahitian Tide. Spritz lightly with water, let the colours run together a bit and press into your background layer.
If you have excess ink, absorb it with a piece of paper towel or toilet paper! It’s amazing how well this works!
When your background is dry, tap a water painter so that a few drops fall down. This gives a great effect.
Video Tutorial
For these types of watercolour tips, watching a video is always pure gold!! I hope you enjoy watching this amateur get some pretty awesome results. Trust me, I was very nervous to share this with you not knowing how it would turn out.
Inspiring Each Other
I am humbled and grateful at the inspiration that I gain from my fellow demonstrators. Without Tami Hewlett’s inspiration, I would never have made this card. I didn’t watch her video or even read her blog post, I just saw her card and started playing. Now I see that I used different ink colours than she did and the results are still fantastic. Where to you seek your inspiration?
My hope that when you see me trying new things, you will also feel empowered to do it as well. Creativity is so thrilling!! Have a super day, and please shop with me if you live in Canada or in Europe, your business keeps me going!!
Hello stampers and happy Saturday to you. I know! A blog post on Saturday? This free split sponging technique Zoom class is so exciting to me that I just couldn’t wait to share it with you. While you are reading this blog, I am sharing this card with the 25 Dutch demonstrators that came to my High Tea and Paper Pumpkin event. When demos get together we usually like to swap. That means that I will be sharing my swap cards with you in the next little while.
Free Zoom Class with the Split Sponging Technique
Why do a free Zoom class? I’ll be totally honest. The truth is that running my business online can get a bit lonely. With the fact of living in two countries and traveling a lot back and forth, it is difficult to hold consistent in person classes. While I love creating video tutorials, I thought it would be a nice change to be able to see you as well. Creating a lively stamping community is dear to my heart. Here is the link to the event where you can also get the Zoom link to join in on this free class which will be on Tuesday May 9 at 4pm CET which is 10am EST. You can google what time that is in your time zone.
Split Sponging Technique Cards
Here you can see what we are going to be creating. It’s really so simple, yet so striking. Huge thanks to Jay Soriano for sharing this technique and layout. If you want to see more cards made with Artistically Inked, check out this blog post.
Of course I couldn’t leave the inside of the card blank, so I stamped the small flower from Artistically Inked in the inside using Melon Mambo and Parakeet Party for the leaves. You can really see the distINKtive design of this stamp. Basically this means that you get a variegated colour with just one simple stamp. I love how artistic this makes me look and feel!
What to do before the free Zoom class
First of all you are going to want to put the date and time into your calendar on your phone so that you get a reminder. Then click “going” on my event page so that I know I won’t be stamping alone. Be sure to check out the supply list below to make sure you have what you need to play along. Questions? Message me; I love to help.
Zoom Recording
Did you miss the free Zoom class? Here is the recording for you. Enjoy!!
More Resources
If you already have the Artistically Inked stamp set you might want to get this pdf tutorial bundle which is now half price!
Thanks for joining me today. If you like what you see, please share either on Facebook or Pinterest. Comments are always appreciated too! Have a super day.
Hello stampers and happy Tuesday to you. Today I am sharing a gorgeous vintage Abigail Rose card with you. Vintage cards usually have lots of layers and more muted colours as well as distressing, torn and curled edges as well as linen thread or lace trim. My card uses the lovely Abigail Rose paper. For a complete list of the products used just scroll to the bottom of this post to the product list.
More than just a product list
Here is a closeup of the vintage Abigail Rose card. You can see the background stamps in crumb cake. I spritzed the paper with rubbing alcohol and then scrunched it up into a ball. Carefully unscrunch it and then let it dry. You can do the same thing with water but the alcohol will evaporate more quickly. Use your blending brush and crumb cake ink to distress the paper. The ink will gather in all the creases for a great vintage look.
Back to that product list. Did you know that it not only a convenient list for you to see what I have used? If you are a Canadian you can click on these links and you will be automatically transported into my online store. Of course I would be thrilled if you did order from me and then I would send you at least one free tutorial bundle as a thank you.
Free Tutorial Bundles?
Which free tutorial bundles do you get with a purchase? Good question. I am a member of three tutorial teams. The first is the International Create With Us tutorial bundle team. This group has demonstrators from around the world, many of whom have been Artisan team members. These tutorials are free with a $60 purchase but also free to team members. The second team is the Demo Design Dream Team which is mostly Americans with two token Canadians, also free with a $60 purchase. The last one is the Bundle Bonus group which is free with a $35 purchase. Let me know which one you want if your order is close to $60. If it is over $120 you get all three!
Video Tutorial
Here is the video I did showing you how to make this fun card. For your information, the Bundle Bonus group has a tutorial bundle on this bundle for this month! Happy stamping!
Have you subscribed?
If you haven’t subscribed to my channel yet, be sure to do so! If you subscribe, please let me know in the comments here and comment on your favourite video. You will then be entered into a draw for the Eden’s Garden bundle. When I get to 5400 subscribers I will do the draw. Thanks so much for joining me today and have a super day.
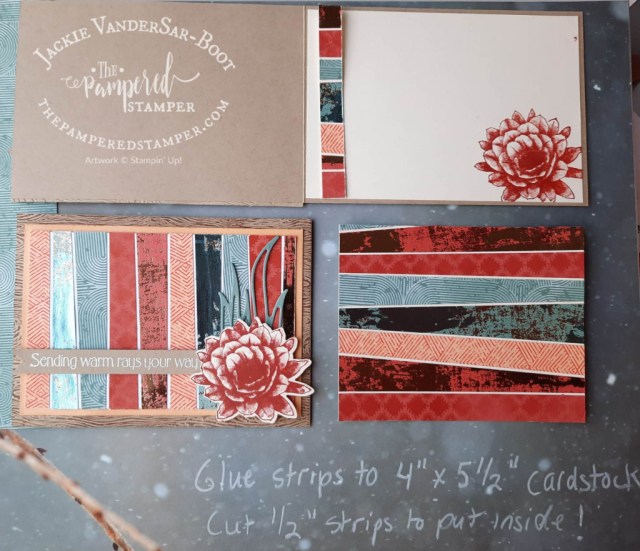
Hello stampers and happy Wednesday to you. Today I am sharing a scrappy strip techqnique. I’m quite sure that this technique was pioneered by Bruno Bertucci from Australia. His card totally captured my heart so I cased it. Bruno’s card is also the one that made me fall in love even more with the Desert Details stamp set. My Tuesday Stories and Stamps YouTube video featured this card and I will share it in this blog post as well.
Scrappy Trip Technique Card with Desert Details
Taking the Party Inside
I especially love the look of the inside of the card. You use the same technique as for the outside of the card except you have the strips going the long way down the cardstock base. See the photo below. After you have covered your cardstock piece, turn it 90 degrees and cut into half inch strips. Just beautiful!!
The sentiment was stamped in Versamark on a strip of Crumb Cake cardstock and embossed in white. The big flower was stamped in Cajun Craze and it looks great either stamped on Crumb Cake cardstock or Very Vanilla.
Video Tutorial for Scrappy Strip Technique
Thanks!
Thanks so much for stopping by today. I hope that you try this technique for yourself. Today is February 1 so that means one more month of saleabration. Is this Desert Details stamp now on your wish list?
Have a super day. Links to shop with me are below.
Hello stampers and happy Friday to you! I am a hot drink lover, what about you? Today is about hot chocolate and coffee, but mostly about the whipping cream!! I made this fun card using the Nothing’s Better Than stamp set as well as the Cup of Tea bundle.
Hot Chocolate or Coffee?
There are two things that I really love about this card. The first is that I made a red polka dot cup and that is is a lot bigger than the tea cup die. Watch my video tutorial to see how I did that! The second thing is that I used our Snowfall Accents Puff Paint to make not only the whipped cream on the hot chocolate but also the steam from the coffee cup. It was such fun to play!
Be sure to take a close look at this card and comment below if you can spot the one mistake!! Not sure how I messed up? Look at the photo below where I have corrected my mistake. The people who comment and guess correctly will be in a draw to get this card in the mail.
Video Tutorial
In this video tutorial you will also see how I used paper piecing to make the cute cups. White craft ink and a sponge dauber were used to make the embossed cup a little more vintage. What do you think?
Subscribe on YouTube!
If you would like to see all of my videos and not miss a thing, be sure to subscribe to my YouTube channel. Just click on the red subscribe button on the bottom right hand corner, it’s that easy! Here is my YouTube channel.
Thanks for joining me today, have a super day!! (click on the photos below in the product list and you will be instantly in my online store, how awesome is that?)


")


 Metallic Edge Cotton Ribbon")
 Bordered Ribbon")


")


")
 Designer Series Paper")
")
")


")


")
 Specialty Designer Series Paper")
 Designer Series Paper")


")
")


 Designer Series Paper")


