
Hello stampers and happy Monday to you. Today I am sharing a card that I call Dragonfly Garden: The Magic of Mist. Truth be told there was a reason this stamp set had not seen ink for almost a year! I didn’t love it, largely because of the patterned paper that was included in the suite. It didn’t appeal to me, so this bundle sat on the shelf. Today it has been transformed and I like a lot more!! Simply by adding a little mist, these stamps were softened and transformed into a work of art that I love. Let’s take a look.
Dragonfly Dreams
For this card I used two very important products: the stamparatus and shimmery white cardstock. Without those two things you will have limited success. I Inked up the floral image with retiring In Colour Stampin’ Write Markers: Just Jade, Misty Moonlight, Bumblebee, Cinnamon Cider and Magenta Madness. Before stamping I would lightly mist or spritz the inked stamp. Be sure to wipe off with your shammy in between inking up again and stamping multiple times.

I did end up using the grass stamp from Wildflower Path to fill in the bottom of my scene. Did you notice that I used all the retiring In Colours? This was a happy coincidence but also a timely reminder to check your supplies in these colours. Make sure you have enough cardstock and ink refills and of course the markers!
Video Tutorial
I love watching a video to see how a card is made, it is much easier than reading a written description. Be sure to click on the left hand corner of the video that says “watch on YouTube”.
No Blog on Monday!
Since I will not be blogging on Monday as it is March Break and the littles will have moved in with me, I am going to make this an extra long blog post. I want to share some similar cards also using Wildflower Path. For these cards I did not use “the magic of mist” but I did use my stamparatus!! I used grid paper to create a heart mask. My exclusive video tutorial for these cards is on my Prime Time group. This is a very affordable private group that you are welcome to join! It’s only $10 a month, the price of a fancy drink and a treat. You also get a free monthly 16 project pdf tutorial that is worth $20 so you are getting double the value and then some for your investment. I must be crazy!! Click here to join.
Heart Mask Collage Stamping
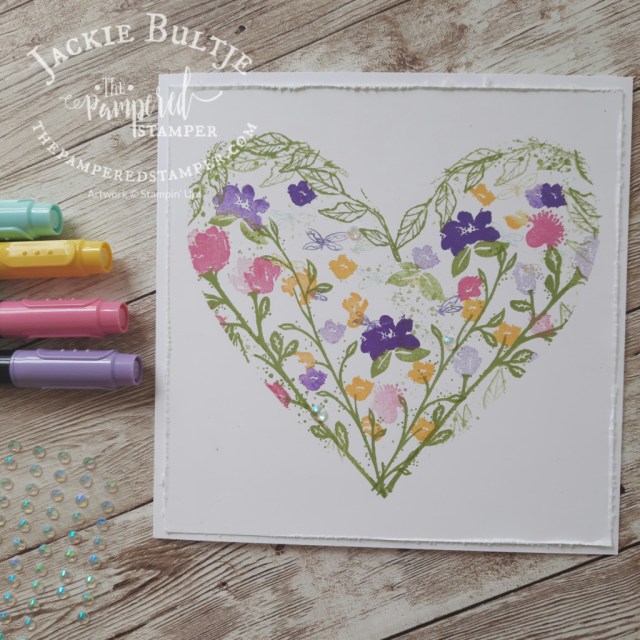
For my flowers I used the following markers: highland heather, daffodil delight, polished pink and gorgeous grape. The leaves and stems were stamped in pear pizzazz. The question is, do we like it better plain or with a sentiment?

Here you can see the card with two different sentiments. The long skinny one is from Waves of the Ocean. The die from the other card is also from Waves of the Ocean bundle.

Here you can see the gorgeous detail in this closeup of the heart collage card.

A Little Addicted!
I think I may be a little addicted to this technique. A special thanks to Gez Carpenter for sharing this on the Demonstrator Planning Place on Facebook. You can find her blog here.
I made this last card using a very beloved stamp, Free as a Bird. What do you think? This time I used Pool Party and Balmy Blue Blends to colour the birds.

Thank you!
That’s it for today, it should give you lots of ideas for inspiration. I hope you have a super day and don’t forget to get the great deal on the mini die cutting machine! I used it last night to do some embossing and it was such a pleasure to work with. (just a heads up the natural tones Blends are backordered until April 4- bummer!)
Product List
|
| |||
")
")


Love both cards! Thoroughly enjoy your videos.
Thanks so much for taking the time to comment Judy, I appreciate it!
love the heart, all the diff ways u do it