
Hello stampers and happy Monday to you. If you follow me on YouTube then you already know that I have been having a lot of fun with embossing paste. In fact, my container is almost empty! The last trick I want to do with it is to tint it with re-inkers. In the meantime, here are two cards that I made with embossing paste. The first one was in my Sweet Suite Tuesday video. Since embossing paste takes a few hours to dry completely, I needed to have an extra one on hand to be able to finish my card during the video.
An Extra Piece for Inspiration
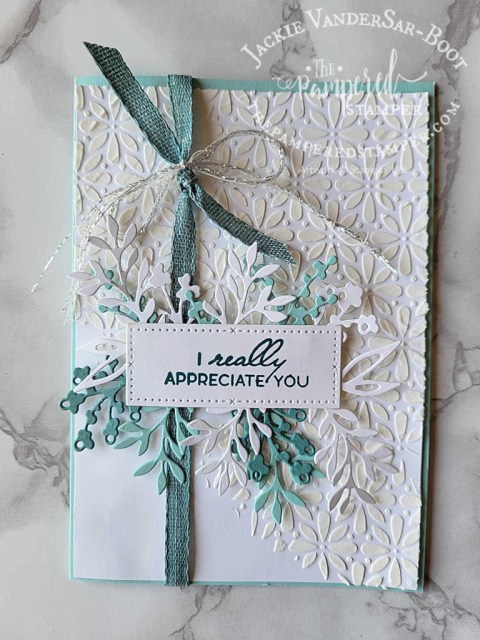
I had the lovely problem of having an extra piece of embossing paste background. If you look closely at the next card you will see that has the same pattern but I turned it sideways. The open space left just enough room to stamp the sentiment. Don’t you think that it makes a very lovely sympathy card?

Here you can see the closeup of this lovely card. Do you see the ribbon? It is frayed because I ripped off the one side to make the pretty bow on the pool party card in this post. You will see how I did it in the video tutorial.

Embossing Paste with the Truck Bundle
A week or so ago I made a trio of cards using the Trucking Along bundle. You can see those cards here.
Video Tutorial
Here is the video tutorial for the embossing paste background card. Maybe you will be inspired to try something new when you see how easy it is.
Curious about the “patterned paper”?
Actually, it isn’t patterned paper, it is a background stamp set called Berry Harvest. I tried colouring it with various combinations of Blends and I made a handy little chart to show you the results. Which colour combination is your favourite?

It was a lot of fun to play with the different colour combinations. There is still one stamped image waiting for me. It is stamped in Stazon so that I can colour it with blender pens and watercolor pencils. Stay tuned for when I finish playing with that.
Thanks for joining me today on my blog. If you don’t already have a Stampin’Up! demonstrator, I would love to be yours if you live in Canada or Europe. Just click on the links below to shop with me in Canada or click here if you live in Europe.
Product List
|
|
| ||
| ||||
")


 Metallic Edge Cotton Ribbon")
 Bordered Ribbon")


