Hello stampers and happy Monday to you. Today I am sharing a lovely “Roodborstje” (which is a European robin) card with you that I made for my Cheer Corner last week. There are two things that I think make this card super special. The first is the detail on the birch trees that have been added with a blender pen and a black watercolour pencil. Secondly, the European robin or “roodborstje” has been coloured with watercolour pencils and Blends! Watch my video for the trick to make it easier to blend your colours together!!
Where is the greenery from??
The European robin, or roodborstje, looks quite natural perched in all this greenery. You may have various greenery already to choose from in your existing stash of stamps and dies, but this is what I used. You can thank me that all of the dies and the stamps for the greenery come from ONE bundle, Joy of Noel. It’s a fantastic bundle. You might want to add it to your order on Wednesday when you take advantage of the seasonal sale saving 10-20% on inks, paper, cardstock and ribbon from the annual catalog. This stamp set isn’t on sale, but you may as well add something fun to all the essentials that you will be ordering at a discount. Remember, if your order gets to $200, you also get host benefits even if it is only you ordering. What fun!!
The benefits of bundles
When you order the Joy of Noel bundle you will save 10%. That is because it is a current bundle in the holiday catalog. Perched in a Tree, the stamp set that the roodborstje or European robin comes from was bundled last year with the Aspen dies. It got carried over to the annual catalog and now it is no longer a bundle. No more ten percent discount. That is why I always encourage my customers and team members to buy the bundles when they are first offered as such.
Thanks!
Thanks for joining me today. I appreciate everyone who visits my blog. Please pin the cards that you like to Pinterest. It really helps me!! Have a super day and feel free to click on the links below in the product list to shop with me in Canada. Host codes for both Canada and Europe are on the left hand side of the home page of my blog. Don’t forget to tune into Cheer Corner every Monday at 10am EST in Canada or CET in the Netherlands. Hugs from Holland, Jackie
Hello stampers and happy Tuesday to you. Have you perhaps overlooked the stunning Aspen dies? These dies coordinate with the Perched in a Tree stamp set and today I have altered the die to make a very cute raccoon card.
I was scanning over my stamp sets in my Kallax IKEA shelf and I saw this stamp and realized that I have never inked it up. The Aspen dies had also not been used for a very long time and I wanted to combine them. My first instinct was to use the lovely Fragrant Forest background stamp but this was a better fit. The only obstacle was that the forest was too thick to properly show off my chosen creature, the raccoon.
Wild & Sweet Aspen Dies Card
Here is a picture of my card so you can see how I changed the Aspen die to make it work. If you watch the video, you will get a better idea of how I did it.
Video Tutorial
I always enjoy watching a video to see how the card is made. You can fast forward through the boring bits or if you think my colouring or blending is taking too long. Really, it is a free class! I hope you like it! If you do, please share on social media or comment and give a thumbs up. All those things really make a difference in my business.
Inspired to Create at Home?
If I have inspired you to want to create this at home, you can simply click on the images below of the products and you will be in my Canadian webshop. Live in Europe? Simply go to the Stampin’Up! website and choose Jacomina Bultje as your demonstrator (this is still the name in my passport)
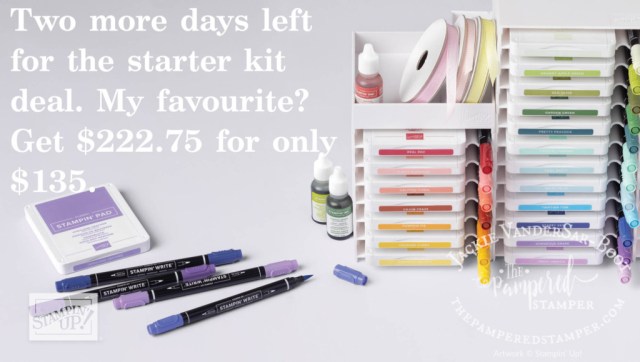
Thanks so much for joining me today, I hope you have a super day. Today is also the last day to take advantage of the starter kit deal. Why not get a ton of great products with no shipping costs that will also give you a 20% discount at least until the end of April 2024?
Well hello stampers!! It has been two months since I have written a blog post and I am sorry about that. I hope you have missed me a bit. Today I am sharing a lovely card with you using the set Whale Watching. Whether or not you have ever gone whale watching, this stamp set is spectacular. Capture the magic and majesty of these creatures on your cards or in your scrapbook pages. Mine was a card for my weekly Cheer Corner and you can also see the video which I will include a little further on in my blog post.
Whale Watching Card
Masking paper was the secret to creating a nice scene for this Whale Watching card. It really is a simple card with just stamps, ink and paper. I used a blending brush and some Blends markers to step it up a notch.
Mini Catalog Inspiration
Do you remember to use your catalogs as tools for inspiration? Sometimes we forget, don’t we? There is a great card that I want to share with your from the mini catalog. It uses this Whale Watching set in conjunction with Waves of Inspiration and the Nested Essentials dies. Brilliant really!
Video Tutorial
Ready for Something Special??
If you have been following my blog for a while as well as my business Facebook page, you will know that Stampin’Up! has really enriched my life. I have met SO many wonderful people through stamping. You can too!! There is absolutely no need to be a stamping super star, but you can still have the benefits of this amazing stamping community. How??
Change your life and get the starter kit! This will mean that you are on my Beyond Pampered team. Together we do such fun things, the best of which are the team retreats. They are truly life-changing! The starter kit also means getting your own stamps at a 20% discount.
Did you know that if you get the starter kit this month you get either 35% off OR 35% more in your kit? You also get to keep your discount until the end of April 2024 regardless of how little you purchase. Truly, you have nothing to lose and everything to gain!!
Are you ready to take this exciting step? If so, click here to join my team in Canada. Live in Europe, you can click here to join my team.
A Personal Note
We are now all moved into the home where Gerard grew up, right next to the greenhouse. That means that I now have my stamp room on the main floor where the living room used to be! You can guess what that also means. I have to keep it neat!! I do love the natural light and I can see right into the greenhouse to see Gerard work. We now have coffee together every morning at 10am in the greenhouse. On December 28 I will fly back to Canada to spend a late Christmas with the kids and then have a team retreat from January 2-4. Maybe you can come too??
I hope you have a super day, and thanks so much for joining me today.
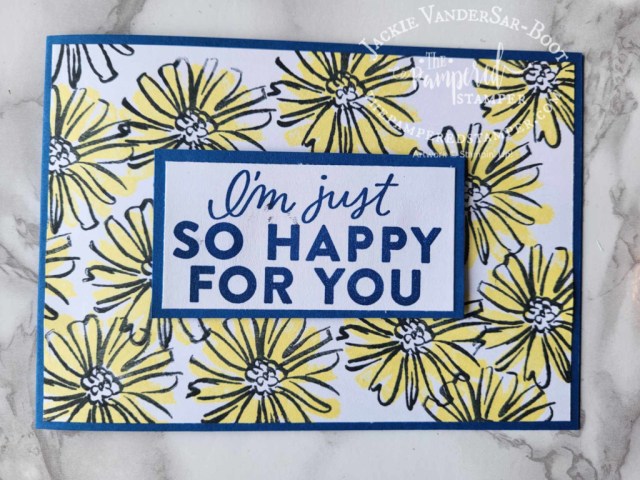
Hello stampers and happy Monday to you. Simple stamping for easy backgrounds! Today I am sharing some easy cards that you can make with creating your own stamped backgrounds. I used the Color & Contour stamp set with Blueberry Bushel and Lemon Lolly.
Here is a closeup of the stamped background. You could do it with or without the dotty stamp.
A few more simple stamping for easy backgrounds ideas
Do you see the blue mat behind the “I’m just so happy for you”? That is the piece that was cut off from the card above! This was the result of my impatience. I needed a mat for my sentiment but the only piece of Blueberry Bushel cardstock that I had nearby was already cut and scored into a card! I cut a piece off the one end and then couldn’t bear to throw the rest of the card away or cut it up, so I designed the card above with it. Here you can also see what the background stamping looks like without the “dotty” stamp. Which one is your favourite?
For the card below I chose to keep it cleaner by omitting the blue mat and using a scalloped stitched die instead from the Scalloped Contours dies. I also fussy cut one of the flowers from the stamped background to pop up on the lower left hand corner. This is a stepped up version of the last card. Do you know where the saying is from? Check out the Good Feelings stamp set and see how you can use it for background stamping here.
Video Tutorial
Here is a video tutorial for these cards, but you can also check out this “short” on YouTube to see the background stamping done in Berry Burst.
So easy to shop with me!
Did you know how easy it is to shop with me? If you live in Canada, you can just click on the images in my product list to shop with me. If you live in Europe, you can click here to shop with me, join my team or host a workshop. Thanks so much for joining me today, I hope I have inspired you to do some simple stamping and make your own backgrounds! Have a super day.
Hello stampers and happy Wednesday to you. Today I have a beautiful tinted embossing paste butterfly card for you. If you have been following me on my YouTube channel, then you might know that I have been a little obsessed with embossing paste. Once you open a jar, you just want to keep playing. Want to see what I made??
Beautiful tinted embossing paste butterfly
First off: a disclaimer. The Butterflies & Flowers layering decorative masks are no longer available. Every year Stampin’Up! “retires” some products and this is one such product. They have different masks available now but this was one I had on hand that would really show off the tinted embossing paste technique.
I first used a blending brush to make a solid butterfly image. Then I used the detailed image at the bottom to use with the embossing paste. Just two drops of pool party reinker were added to about a tablespoon of embossing paste. I put it in a little bowl and stirred it with the smallest palette knife. If you want to see the whole card being made, just watch the YouTube video tutorial at the end of this blog post.
Here you can see how nice the tinted embossing paste looks up close.
Video Tutorial
More Embossing Ideas
Did you know that I am a member of the International Create With Us tutorial bundle team? This month our tutorial bundle features embossing folders. You can get this fifteen card tutorial for free if you order online through me or you can purchase it in the tutorials section of my blog. Below is a sneak peek of our tutorial. PDF tutorials are a great way to jump start your creativity and to become a more talented stamper. Enjoy!!
Thanks for joining me today, I hope you have a super day!
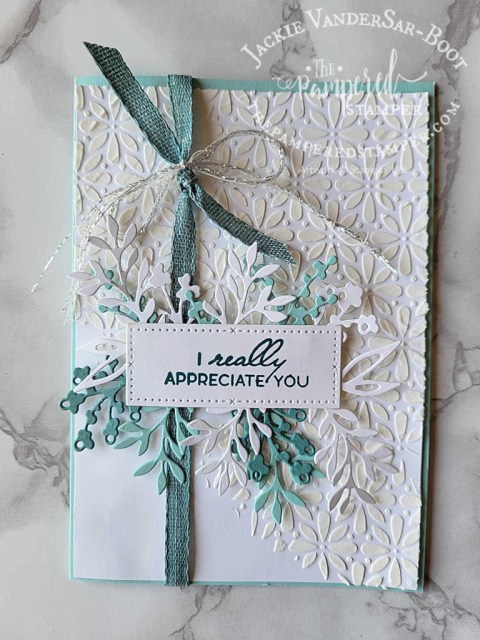
Hello stampers and happy Monday to you. If you follow me on YouTube then you already know that I have been having a lot of fun with embossing paste. In fact, my container is almost empty! The last trick I want to do with it is to tint it with re-inkers. In the meantime, here are two cards that I made with embossing paste. The first one was in my Sweet Suite Tuesday video. Since embossing paste takes a few hours to dry completely, I needed to have an extra one on hand to be able to finish my card during the video.
An Extra Piece for Inspiration
I had the lovely problem of having an extra piece of embossing paste background. If you look closely at the next card you will see that has the same pattern but I turned it sideways. The open space left just enough room to stamp the sentiment. Don’t you think that it makes a very lovely sympathy card?
Here you can see the closeup of this lovely card. Do you see the ribbon? It is frayed because I ripped off the one side to make the pretty bow on the pool party card in this post. You will see how I did it in the video tutorial.
Embossing Paste with the Truck Bundle
A week or so ago I made a trio of cards using the Trucking Along bundle. You can see those cards here.
Video Tutorial
Here is the video tutorial for the embossing paste background card. Maybe you will be inspired to try something new when you see how easy it is.
Curious about the “patterned paper”?
Actually, it isn’t patterned paper, it is a background stamp set called Berry Harvest. I tried colouring it with various combinations of Blends and I made a handy little chart to show you the results. Which colour combination is your favourite?
It was a lot of fun to play with the different colour combinations. There is still one stamped image waiting for me. It is stamped in Stazon so that I can colour it with blender pens and watercolor pencils. Stay tuned for when I finish playing with that.
Thanks for joining me today on my blog. If you don’t already have a Stampin’Up! demonstrator, I would love to be yours if you live in Canada or Europe. Just click on the links below to shop with me in Canada or click here if you live in Europe.


")


")
")


 Designer Series Paper")
 Textured Ribbon")


")

")


 Bordered Ribbon")
 Grosgrain Ribbon")


")

 Metallic Edge Cotton Ribbon")


