Hello stampers and happy Monday to you! Today I am sharing some Timeless Arrangements cards with you. I adore this bundle because it makes it SO easy to make “timeless arrangements”. The name of this stamp set is so fitting, because the cleverly designed dies make it so easy to make beautiful arrangements that are indeed “timeless”. They can be used for any occasion, at any time of the year. Let’s take a look!
Timeless Arrangements Cards
Truth be told, I went a little bit crazy when I started creating with this bundle. Not all the cards fit the colour scheme, but I think you will agree that they are pretty special!
Try something new! Click on the photo above and see what happens. If I did it right, and you live in Canada, then you should be “in” my webshop with all the products listed that I used for these cards. Let me know if it works!!
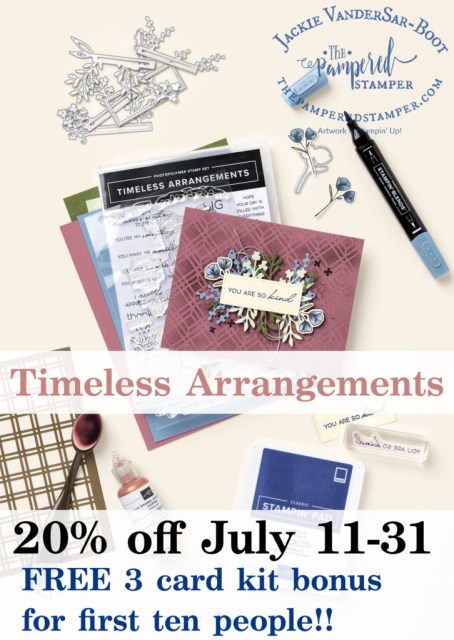
Great Deal in July!
Summer is often a slow month for stamping sales and I really, really want to earn the Mexico incentive trip, mostly for Gerard because he loves to scuba dive and hasn’t done it for years, but also because it is the hallmark for knowing that you are running your business well. I very much appreciate every order that comes my way!! Timeless Arrangements is my deal for July and you get 20% cash back of the catalog price if you order through me. If you would rather get a different incentive, you can also choose a package of embellishments sent to you in a pretty card, or a mystery box from my stash!!
More Inspiration
This is a monochromatic card that I made showing how versatile this bundle is.
Here is another favourite which was inspired by Amy Cook.
Video Tutorial
I always enjoy seeing a stamp set in action, so maybe you do too! Check out my video from last week and remember, each Tuesday in July will feature another Timeless Arrangements card. Live in Canada or Europe? Order your bundle today and get 20% cash back from the catalog price!!
Thanks!
Thanks for joining me today. If you enjoyed this post, please share on social media, that really helps me!! If you live in Canada, you can click on the images below if you want to order them through me. I appreciate you!! Have a super day.
Hello stampers and happy Friday. Today I am sharing a super fun technique with embossing paste. Did YOU know that Stampin’Up! sells embossing paste? My job as a Stampin’Up! demonstrator is to share with you all the hidden gems in our huge annual catalog. Even I forget sometimes about all the amazing products that we have. My embossing paste was hiding in the cupboard for a while too!
Amazing Embossing Paste Trick
A few days ago I created a post sharing my top five videos over the years. One of them was a technique that involved stamping on embossing folders. This inspired me to do something new with an embossing folder and I am sharing the result with you now. Are you curious?
What to do
First you cover your work surface with a piece of grid paper or computer paper. Put your card down and carefully spread embossing paste over your card front or cardstock layer using a palette knife. Set aside on a new clean surface. Clean your palette knife. If you don’t do this right away it will harden and dry making it difficult to clean.
Ink up your embossing folder, either side work for the exposed brick embossing folder. Press the embossing folder into the embossing paste surface of your card. Press down firmly and then carefully peel it away. Watch my video as seeing is believing!
Spritz the back of your cardstock with water so that it doesn’t end up curling. When your embossing paste is dry (this could take a few hours) press it down with a few punches stacked on top of each other. This helps flatten your card.
After the embossing paste is dry and the card is flattened you can add your other elements using either liquid adhesive or dimensionals.
Which is your favourite colour? Cherry cobbler, Pebbled Path or Copper Clay for the embossing paste embossed exposed brick wall?
Video Tutorial
Prime Time With The Pampered Stamper
This video was intended for my private Prime Time group. You can also join this group. It costs $30 for three months. What do you get? First you get a weekly exclusive video tutorial each Thursday at 10am EST. Each Wednesday I post the supply list as well as the dimensions of your paper pieces. Each month you get a free 15 card pdf tutorial which is worth from 15-20 dollars. You can see that your ten dollars a month is a true bargain. Click here to join.
Thanks so much for joining me on my blog today. I love being a Stampin’Up! demonstrator in both Canada and Europe. If you need one, you know where to find me! Have a super day.
Hello stampers and happy Monday to you. Masking Paper and Blending Brushes add up to a lot of fun AND some pretty awesome cards. I will be teaching these cards tomorrow in person and I am so looking forward to that. Today I also made one of these cards for my weekly Cheer Corner which is live on Facebook every Monday at 10am EST or 4pm Central European Time.
Video Tutorial
Three More Cards with Masking Paper
I must admit that I used our retired layering ovals dies to make the mask for these cards. Here’s hoping that they end up in our new annual catalog on May 1!
Thanks for joining me today. If you live in Canada you can get these products in my online store by clicking the links below. Live in Europe? Then you can shop with me here or join my team. Have a super day!!
Hello stampers and happy Wednesday to you. I am really excited to share these cards with you today. Embossing on patterned paper is so much fun! These cards combine two of my favourite things: patterned paper and Memories & More cards. The large Memories & More cards measure 4 1/4″ by 6 1/4″ so they are bigger than our standard sized cards. This means you have a bigger “canvas” to show off our beautiful patterned paper!
Embossing on Patterned Paper
To keep the focus on the patterned paper and on the striking die cuts, I decided to simply emboss right on the patterned paper in white. Don’t you just love the look of this?
The Process
Here you can see my desk with some of the elements that I used to make these cards. The key is to cut the patterned paper into 3/4″ strips. I started with a 4″ by 6″ piece of patterned paper. You will end up with 8 strips but you only need 7. The big decision is whether to discard the top strip or the bottom one!
For the pink card above, I first embossed the flowers in black before cutting into strips. All of the cards had the sentiment embossed after the strips were adhered to the coordinating cardstock which measures 4 1/8″ by 6 1/8″. You could choose to emboss your sentiment first as well before cutting into strips. Take a look at my last card. You will see that there are bits of embossing in between the gaps of patterned paper. If you don’t like that look then emboss your larger sentiments before cutting your patterned paper into strips.
Video Tutorial
Seeing is believing and it is also easier than reading instructions, so feel free to take a look at my video. I would love it if you would also subscribe to my channel and leave a comment and a thumbs up!
Shop with Me!
You may not be aware that I am trying to live in two countries! Most of my time is spent with my husband in the Netherlands, but I travel back to Canada frequently to visit my mom, siblings, children and grandchildren. This craziness makes it difficult to schedule regular classes, so I rely on online sales to keep my business afloat. That means that YOUR online order would be greatly appreciated. You can shop with me in Canada by clicking on the links below OR you can click here to shop with me in Europe.
Thanks for joining me today! If you enjoyed these cards, leave a comment below so that I know you were here. Have a super day.
Happy Friday stampers! I have a great Watercolour World card that is a great way to end your week. This is a background stamp that is fun to personalize with the À la Carte Alphabet dies. I have seen many people use either a person’s name or Happy BDay but I thought it would be fun to choose numbers for the year.
Watercolour World Card
I love Tahitian Tide combined with Parakeet Party, so that is what I used for this Watercolour World Card. The background stamp was inked up first in Tahitian Tide. I used the Stamparatus so that I could stamp multiple times to get just the right shade. To add both depth and interest, I sponged the edges of the world with Starry Sky. The Stamparatus is perfect for being able to stamp multiple times in the exact same spot to get that shading just right. Have I told you how much I love this tool?
Finishing Touch
The Watercolour World stamp doesn’t need much to finish it off but I thought that this Basics Borders die would be the perfect touch. It provides a nice contrast to the Parakeet Party numbers and coordinates with the inked image. Perfect colour coordination is the nicest feature that Stampin’Up! offers. Don’t you agree?
The last secret ingredient to your success with this card is our adhesive sheets. Just cut off a small part and put it behind the Parakeet Party Cardstock. When you die cut the numbers you have instant stickers! This is much easier than adding liquid adhesive to these skinny numbers. Be sure to get them before saleabration ends! You may as well get some free products with your purchase. Click here to see your options!
Video Tutorial
On February 28 you will be able to see the video tutorial on this card. Happy stamping and thanks so much for joining me today. If you subscribe to my channel, then you will be notified when this video goes live.
Hello stampers and happy Saturday to you. Today I am sharing two fun cards using the Dots & Spots die for simple fun backgrounds. I love polka dots and this die makes it easy to customize your background to suit your needs. These just happen to be Valentine’s cards too!
Dots & Spots Die
Have you seen this die in the annual catalog? Perhaps like me, you got it as a free saleabration item last August. I am curious what you think about these cards. Are you a polka dot lover or not?
Here is a closeup:
Video Tutorial
If you would like to see the video tutorial you can join me on Valentine’s Day. Isn’t that appropriate?
A few other products!
I forgot to add some of the products that I used to my supply list. The sentiment came from Rejoice in Him. The black floral die cut is from Penned Flowers. Lastly the oval frame is from Fabulous Frames.
There is less than three weeks left in saleabration, so be sure to order the things you love now and get those bonus freebies. Extra options have been added including the Eden’s Garden bundle free with a $120 purchase. Pretty incredible!!
Best Decision Ever!
The very best thing that you can do for yourself is get the starter kit. Did you know that you can pack $225 worth of products of your own choosing and pay only $135? No shipping and no tax either. Keep your discount which is 20% for at least six months after you get your starter kit. More questions? Ask me!! Otherwise click here to join my fabulous team.


")
 Designer Series Paper")


 Metallic Edge Cotton Ribbon")


")


 Circle Punch")


")


")


 Designer Series Paper")


")

")


")
")


