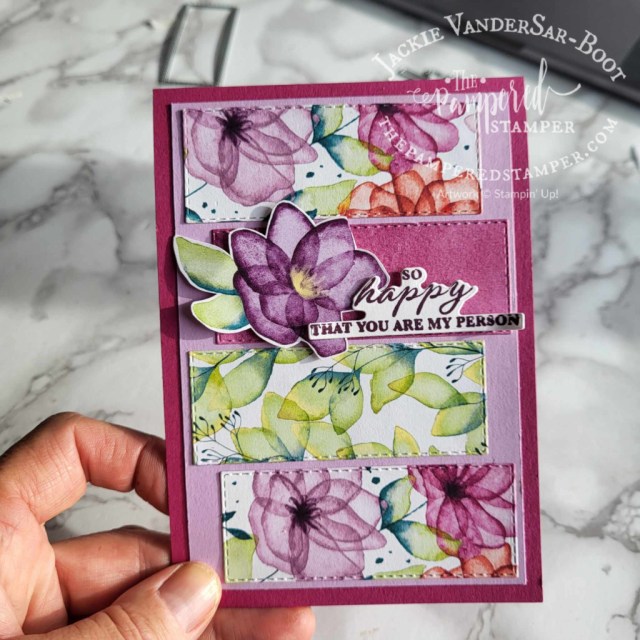
Hello stampers and happy Wednesday. Today I have some gorgeous Delightful Floral cards for you. This paper is simply stunning and can be found in the Online Exclusives section on the Stampin’Up! website.
For this first card I cut out some of this lovely Delightful Floral paper with the rectangle stitched dies. The flower was also fussy cut from the paper. The sentiment is from Wonderful Thoughts stamp set and dies.
For this card below I used two different pages from the Delightful Floral paper pack and embossed right on the patterned paper. These sentiments are from Sentimental Park.
This cute card uses the small Assorted Memories & More card as well as a label die cut from Sentimental Park and the Delightful Floral paper. One side of this paper is a stunning watercolour wash that is fantastic for stamping on.
Below you can see the trio of cards that I made using Sentimental park stamp set and dies as well as the Delightful Floral paper. It was quite addictive once I got started!! Remember, a set of matching cards can make a very thoughtful gift to a non-stamping friend!
I forgot to include in the product list that the dies and the sentiments for these last three cards are from Sentimental Park.
Video Tutorial
I always try to include a video tutorial in my blog posts because I am a visual learner. Do you learn that way too?
Thanks!
Thanks for stopping by my blog today. I hope you were inspired and that it was also refreshing to see some cards that are not Christmas cards. Of course I am also in full swing for making Christmas cards but I still had some blog posts in the wings waiting for me to complete them and post them. Want to create these cards at home and live in Canada? You will make my day if you click the links below to shop with me. Hopefully I will then make your day by sending you a free pdf tutorial bundle!
Hello stampers and happy Monday to you. Today I am sharing a lovely “Roodborstje” (which is a European robin) card with you that I made for my Cheer Corner last week. There are two things that I think make this card super special. The first is the detail on the birch trees that have been added with a blender pen and a black watercolour pencil. Secondly, the European robin or “roodborstje” has been coloured with watercolour pencils and Blends! Watch my video for the trick to make it easier to blend your colours together!!
Where is the greenery from??
The European robin, or roodborstje, looks quite natural perched in all this greenery. You may have various greenery already to choose from in your existing stash of stamps and dies, but this is what I used. You can thank me that all of the dies and the stamps for the greenery come from ONE bundle, Joy of Noel. It’s a fantastic bundle. You might want to add it to your order on Wednesday when you take advantage of the seasonal sale saving 10-20% on inks, paper, cardstock and ribbon from the annual catalog. This stamp set isn’t on sale, but you may as well add something fun to all the essentials that you will be ordering at a discount. Remember, if your order gets to $200, you also get host benefits even if it is only you ordering. What fun!!
The benefits of bundles
When you order the Joy of Noel bundle you will save 10%. That is because it is a current bundle in the holiday catalog. Perched in a Tree, the stamp set that the roodborstje or European robin comes from was bundled last year with the Aspen dies. It got carried over to the annual catalog and now it is no longer a bundle. No more ten percent discount. That is why I always encourage my customers and team members to buy the bundles when they are first offered as such.
Thanks!
Thanks for joining me today. I appreciate everyone who visits my blog. Please pin the cards that you like to Pinterest. It really helps me!! Have a super day and feel free to click on the links below in the product list to shop with me in Canada. Host codes for both Canada and Europe are on the left hand side of the home page of my blog. Don’t forget to tune into Cheer Corner every Monday at 10am EST in Canada or CET in the Netherlands. Hugs from Holland, Jackie
Hello stampers and happy Wednesday to you. Today I am sharing Warmest Heart with you. I don’t think it is the most popular bundle in the holiday catalog from Stampin’Up! but it sure caught my eye. As soon as I saw the thermos stamps and dies, I thought of Pap. I grew up on a farm and we often brought him his lunch and a thermos of coffee to the field. Dutch people LOVE their coffee, so this was liquid gold for him. As a child, it felt so good to be able to do something for him knowing he was working so hard for all of us. Do you have any thermos stories??
Warmest Heart Thermos Cards
Here are the cards that I made with this set so far. One is definitely in the colours that remind me of my Pap. He died last year at the beautiful age of 95 and I was blessed to be by his side. I still think of him with fond memories every single day. The second card is cased from the catalog and is in more retro colours.
A Retro Touch for the Warmest Heart Thermos
The more retro card below uses Crushed Curry, Pool Party and Petal Pink. The cardstock is Lost Lagoon and perhaps I could have used that instead of Pool Party too, but I rather like the colour combination.
Here’s a shot of the inside of the card. I “took the party inside”.
For the thermos cap I used the die with our Silver adhesive backed glimmer paper. It’s really awesome for the little details.
This is what Wendy Lee, a talented demonstrator from the USA, said about this bundle:
“Make a cozy cup of something special to share with your friends with this fun bundle. Create Thank You, Get Well Soon, winter, or adventure cards (or even cards just because!). Use the insulated bottle dies and stamp on a few sticker accessories to personalize each craft. Or stamp the plaid pattern on your die-cut insulated bottles to create a matching set. Don’t forget to accessorize to add even more dimension to your already unique drink carriers. And have fun!!”
Video Tutorial
Here is a video tutorial that I did for this set. Enjoy!!
Thanks for joining me today! As always, if you are Canadian, you can just click on the links below to shop with me. When you do, I will send you a great pdf tutorial bundle. Our latest one from the International Create With Us group is all Fancy Folds.
Hello stampers and happy Wednesday to you. Today I am sharing quite an incredible card with you. It’s called a double easel fold card, but my favourite part is the way the beautiful Aspen dies cut out creates the perfect backdrop for the pretty bird. This was NOT my original idea, it was cased from Jo Blackman. You can see her card here.
Double Easel Fold Card
Here is a photo of the card that I made. Soft Seedlings was the stamp set that Jo used for her leaves, but this set is now retired, so I used the Autumn Leaves bundle from the holiday mini. If you are Canadian you can simply click on the links below in the product list to order them for yourself!
Here you can see the side view. I added coins (10 cent euro coins) to add weight to the bottom of each fold so no mechanism is needed inside to keep the lovely fold.
Video Tutorial
You will find it most helpful to take a quick peek at my video so you can get the measurements and see how the card is put together. There are some great colouring tips for colouring with watercolor pencils as well. Take this opportunity to subscribe to my YouTube channel as well so you don’t miss out on any future videos.
Perfect for Christmas
Perched in a Tree as well as the Aspen dies would be truly lovely for your Christmas cards this year. Did you know that you can also alter the die to make it even more versatile? Check out this blog post to see what I did with it.
I am excited to play with these products a little more and create some stunning Christmas cards with it too. This set is so versatile since it can be used for many different seasons and occasions. Thanks for joining me today, have a super day!!
Hello stampers and happy Tuesday to you. Have you perhaps overlooked the stunning Aspen dies? These dies coordinate with the Perched in a Tree stamp set and today I have altered the die to make a very cute raccoon card.
I was scanning over my stamp sets in my Kallax IKEA shelf and I saw this stamp and realized that I have never inked it up. The Aspen dies had also not been used for a very long time and I wanted to combine them. My first instinct was to use the lovely Fragrant Forest background stamp but this was a better fit. The only obstacle was that the forest was too thick to properly show off my chosen creature, the raccoon.
Wild & Sweet Aspen Dies Card
Here is a picture of my card so you can see how I changed the Aspen die to make it work. If you watch the video, you will get a better idea of how I did it.
Video Tutorial
I always enjoy watching a video to see how the card is made. You can fast forward through the boring bits or if you think my colouring or blending is taking too long. Really, it is a free class! I hope you like it! If you do, please share on social media or comment and give a thumbs up. All those things really make a difference in my business.
Inspired to Create at Home?
If I have inspired you to want to create this at home, you can simply click on the images below of the products and you will be in my Canadian webshop. Live in Europe? Simply go to the Stampin’Up! website and choose Jacomina Bultje as your demonstrator (this is still the name in my passport)
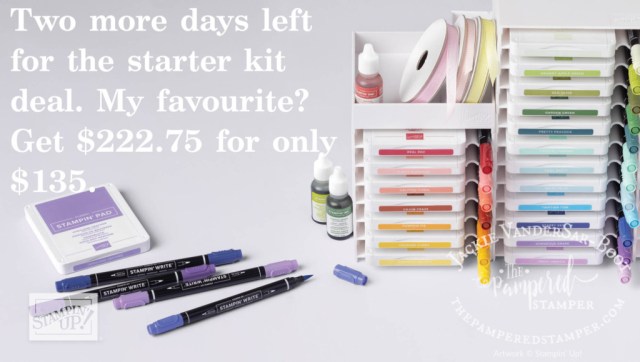
Thanks so much for joining me today, I hope you have a super day. Today is also the last day to take advantage of the starter kit deal. Why not get a ton of great products with no shipping costs that will also give you a 20% discount at least until the end of April 2024?
Hello stampers and happy Monday to you. Gloriously Made is a stunning bundle that you may have overlooked in the annual catalog. The dies are my favourite things in this bundle but the stamps are also glorious, pardon the pun. This set is aptly named!
The card above was inspired by Jenni Pauli a fellow demonstrator from Germany. I attended her 10 year stampversary event in May and she had a slimline card that inspired this one. I love the soft colours of Lemon Lolly and Soft Sea Foam.
Masking Technique Card
You can also use your dies from Gloriously Made to make your own acetate mask and then use it to make this stunning card. Bojo Blue, Old Olive and Vellum cardstock combine for a soft look.
With the card above and the card below, you can see how lovely the sentiments are when they are stamped in Versamark on black cardstock and then embossed in white. It makes for such a great contrast and makes up for the small size of the font. If you want to see a short video of how to do this technique, you can check it out here.
Video Tutorial
What do you love about my blog?
I like to end my blog posts on a personal note, and today I am wondering what you love about my blog? What prompts you to come to my blog and read my posts? If you have any feedback, I would love to hear it. Are the links in my product list helpful to you? Have you considered shopping with me or joining my team? Do you just read the blog posts or do you check out the other sections on my blog? So many questions, and I hope that you consider answering some of them.


 Designer Series Paper")


")


")


")
")


")
")
")
 Adhesive Backed Glimmer Paper")


")


")

 Specialty Paper")


 Designer Series Paper")
 Textured Ribbon")


")


