Hello stampers and happy Wednesday to you. Today I am sharing my new Arctic Bears card series with you. I will be making one of these cards each Tuesday in November at 10am on YouTube and Facebook. You can purchase the card kit including shipping for only $25. If you order the bundle from me then you get the card kit for only $10 plus shipping. Let’s take a look.
Arctic Bears Card Series
What I love about these cards is that they are “all occasion”. They can be used as Christmas cards but they don’t have to be. Polar bears evoke a sense of calm and peace and of caring which is sort of ironic because you certainly wouldn’t want to cross their path in the wild!
Arctic Bears Watercolour
We made the watercolour card that I cased from the catalog at my in person coffee and a card class today. With the shimmery white cardstock base and a water painter, the results were so lovely! I hope you can join me as I make this card in my Virtual Coffee and a Card series next Tuesday at 10am on YouTube. You can check out my playlist here.
Creating a scene with the stamp set is so gratifying. The watercolour technique on shimmery white cardstock is quite simple with a few tips and tricks that I will share on Tuesday. I hope to see you there too!
Have You Chosen Your Christmas Card Design Yet?
I am curious. When you make your Christmas cards, do you choose a single design or a single stamp set or suite? Do you send cards only to very special people or do you have a long mailing list? I do not like making multiples of cards so I have a broad assortment of Christmas cards. This can get me into a bit of a sticky wicket. Sometimes I am plagued by indecision. Who should get which card? So many choices. The most important thing is that you enjoy the process, so be sure to start on time. I hope that I have been inspiring you. As always, the product list is at the bottom of the blog. Simply click on the photos and you will be in my online store. Wonderful, isn’t it?
Thank you for joining me today and have a super day.
Hello stampers and happy Monday. Right before I left Holland I got happy mail with Gorgeous Leaves. I was so happy! Crazy thing is, I was just thinking, this is the first time I have been in Holland where I didn’t get any happy mail. Thanks to Bianca Rebel for this beautiful card. Let’s take a look at it shall we?
Gorgeous Leaves Happy Mail
Bianca used a stitched rectangle 3 1/8″ by 3 1/2″. This was matted on a piece of Old Olive cardstock 3 3/8″ by 3 3/4″. I just love the colours she used. That touch of Highland Heather is perfect and I wouldn’t have thought of it myself.
I thought I had written another blog post about this stamp set but it appears that is not the case. It is true that I did make another card and a tag with this set but it never made it into a blog post! Go figure, crazy squirrel. Let’s see if I at least have a photo of it.
Home Again!
This part was written late Friday evening but then my youngest daughter Rachel arrived home and I decided family time was more important and this blog post could wait.
(I just got home late this afternoon after spending a night at my parents’ place. It was so wonderful to see their joy at my return. Both of them were upbeat and I felt so blessed. The drive home was also sublime as the fall colours were still surprisingly vibrant this late in October. I thought this post was fitting! Gorgeous Leaves really is a lovely bundle and a great addition to any stampers stash. Have a super weekend and thanks for joining me today!)
And Now It’s Monday!
I don’t know about you, but far too often you hear stories about people dying suddenly and far too young. This serves as a reminder to really make your days and your time count. Enjoy your loved ones, savour and treasure their company. Indulge in the hobby that makes your heart sing. Send that card or buy that small gift that you know will surprise and delight someone. Sponsor a kit for a healthcare worker or teacher and restore their faith in the world. It really is the little things that matter so much.
I am looking out of my window as I am writing this blog post and I am enjoying the colourful leaves that brighten this cold and rainy day. My cup of tea is going to taste that much better and it is going to warm my hands and my heart. Thank YOU for stopping by today and reading my words.
Hello stampers and happy Tuesday to you. There is going to be a big sale tomorrow! 15% off of ALL red rubber cling stamps in the annual catalog except for host sets. I am hoping to use this sale to get more kits into the hands of health care workers and teachers! This is how!
Take Advantage and Give!
You can take advantage of the sale and by doing so I will get host benefits. I am going to use ALL the host benefits AND my commission on more kits for our teachers and health care workers. Hopefully you will also add a kit to your order to give to one of these front line workers as well. Together we CAN make a difference.
When you place your online order please use this host code so that I can use my host benefits to get more kits for the teachers and health care workers. Don’t need anything yourself? You can sponsor one or more kits by sending me your $$ via etransfer to [email protected] or through PayPal with the friends and family option.
More Good News!
I worked my tail off to get this huge 16 project pdf tutorial done before I fly home. So happy to tell you I did it! It’s finished and it’s fabulous. Perhaps you would like a copy? This tutorial gives you clear instructions and photos of lots of Christmas boxes, treat holders, cards and even a gingerbread house. It includes a link to a Zoom party on Saturday November 27 where I will demonstrate three of the projects: the gingerbread house, the spinning tower card and the Post-It note holder.
The house is not in this picture because I had to return it to Mardette and I didn’t have the Lots of Snowflakes dies here to make the trimmings for the house. You can see it in this blog post.
If you wish to purchase the tutorial, you can do so here.
“Fun-Raiser” Update
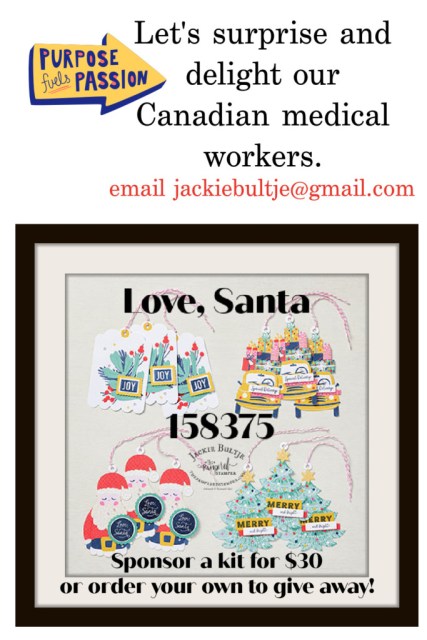
We are now at 26 kits sponsored and that is wonderful. I did a video yesterday showing the Love, Santa kit and explaining that my fellow demonstrator Tamara Bertram sold 75 kits. She lives in Edmonton, Alberta and there has always been rivalry between western Canada and the “east”. Funny how Ontario is in the middle of Canada but is considered to be “east”. Let’s show what we can do together! I would be over the moon to reach my initial goal of 100 but even 75 would be pretty awesome.
Instead of sponsoring a kit for $30, you can now sponsor TWO kits for $40. Two at a time we will reach our goal more quickly. Can I count on YOU to help??
Video of the Love, Santa Kit
Goodbye from Holland
Tomorrow will be my last day here, so no blog post. That is why I am writing one today. Thanks again for joining me, I hope you have a super day. Happy stamping.
Hello stampers and happy Monday to you. Today I have an adorable Milk Carton Gift Box for you. This project will be part of my Cross-Country Cookie Exchange Party With a Heart event and will thus be in the huge pdf tutorial that is a part of this class. Everyone who purchases the tutorial is welcome to send me a recipe card that I will include in my recipe book for Christmas. I am hoping that everyone will also purchase the Strong of Heart stamp set (the heart part of this event) as it is a Stampin’Up! fundraiser for heart health.
Milk Carton Gift Box
Here is the adorable Milk Carton Gift Box. No worries, all the dimensions and directions will be in the pdf for you which is chock full of great Christmas ideas. I will also be doing some videos of these projects on YouTube in November.
PDF Tutorial
I am thrilled to say that I am over half way with this massive pdf tutorial. This will be a classic that you turn to again and again I think. Print it off and put it in clear folders and in a binder so you can reuse it without wearing it out! The promise was to have the tutorial done by November 1 but I am working hard to get it finished before I fly home to Canada on Thursday. Thank you to everyone who has already purchased it sight unseen. I am ever so grateful.
Joining in on the Fun
There are several ways that you can join in on the fun.
You can simply purchase the tutorial. This option is especially for those who are not in the Canadian market so they can’t buy SU products from me. With this option you can still send me a recipe card and I will share it on my blog and in my book. You also get to join in on the Zoom party on November 27 at noon EST.
2.You can get the tutorial and the Strong of Heart stamp set for $55 using the PayPal button. This is meant for people who don’t like online ordering but can manage this option. I will send you your stamp set in the mail. You get all the perks of option one.
3. You can place an online order for $55 and you will get the pdf tutorial for FREE. This is actually the most bang for your buck and is meant for those who can order online with ease. Please do remember to use the current host code which is always on the right hand side of my blog’s home page.
Exclusive Baking Class Option
4. This option comes with a very special bonus. If you purchase the Strong of Heart stamp set and other products for $100 or more you get to join me for an exclusive baking class in my kitchen (either in person or via Zoom) This will be on Monday November 28 at 10am EST. You can also choose option three in the PayPal button.
Flying Home on Thursday
It’s hard to believe that my time here is almost up again. Thursday I fly home to my family and that is wonderful too. Needless to say, I am going to miss Gerard a lot.
Thank you!
I am always so grateful when I see who comes by and reads my blog. Thank you for pinning my projects to Pinterest and taking the time to comment here. Blogging is meant to be a social activity, a community thing, not a solitary endeavour. It is more rewarding than you will ever know when you reach out to me with your own stories or experiences. I hope you have a super day. As always, the links are listed below if you want to purchase any of the supplies that I used today.
Hello stampers and happy Friday to you. My Strong of Heart stamp set came in and I immediately made a card with it that fits with the colour scheme of the Cross-Country Christmas Cookie Exchange with a Heart class. First we’ll take a look at the card and then I will talk some more about this epic class.
Strong of Heart for Christmas
When you first take a look at the Strong of Heart stamp set you may think of Valentine’s Day, but not Christmas. With the colour scheme I chose, this would be a perfect card to send to someone at Christmas, especially to someone who has had some struggles in life and may not want a traditional Christmas card. I made two versions. One is sparkly, the other is slightly more masculine or rustic. Which one is your favourite?
Here is the one that is more rustic. The only difference is that the Be Dazzled paper is taken away. Small but significant detail.
Part of the pdf Tutorial
The purpose of my Cross Country Christmas Cookie Exchange Party with a Heart is three fold. First I want to unite stampers across the country with a recipe swap. Doesn’t that sound wonderful? Second, I want to give you LOTS of great ideas for Christmas cards and projects. Third, I want to raise money for heart health as a fellow demonstrator in Ontario lost her husband to a congenital heart defect. The hospital that tried to save his life is now conducting research to try and prevent more tragedies like this. Stampin’Up! has designated this specific hospital for the funds raised in Canada!! That makes my heart sing.
This card will also be a part of the pdf tutorial that is included in the class/event. You will get the Strong of Heart stamp set as well as the tutorial and there will be a Zoom party on November 26. More details are in this blog post. If you live in the States you can simply purchase the tutorial.
The tutorial will be finished at the latest by November 1, hopefully sooner. I now have all the projects completed, now I need to write it all up and take and edit the photos. Usually it takes at least a full day to write a tutorial, sometimes two! You can order yours here below by clicking on the PayPal button. When it is finished I will add it to my tutorial store on this blog.
Recipe Swap
To participate in the recipe swap you need to preregister for the class which includes the stamp set. Deadline to send out the recipes is November 13. That way we will get them in time to share and talk about at the Zoom party. Please use as your base either 4″ by 6″ kraft paper or crumb cake cardstock. Here is a picture of my recipe card.
To make it less daunting to write out so many recipe cards I am suggesting that you handwrite the front of the card and then print out the instructions and adhere them to the back of the card. Best of both worlds!! During the Zoom party I will demonstrate three of the projects from the pdf tutorial. I hope YOU can join me for this fun class. Thanks so much for joining me today, I hope you have a super weekend. Hugs from Holland!


")


 Host Designer Series Paper")


")
")

")


")


 Paper Pack")


 Designer Series Paper")
 Mini Ruffled Ribbon")


")


")
