Hello stampers and happy Friday to you. My Strong of Heart stamp set came in and I immediately made a card with it that fits with the colour scheme of the Cross-Country Christmas Cookie Exchange with a Heart class. First we’ll take a look at the card and then I will talk some more about this epic class.
Strong of Heart for Christmas
When you first take a look at the Strong of Heart stamp set you may think of Valentine’s Day, but not Christmas. With the colour scheme I chose, this would be a perfect card to send to someone at Christmas, especially to someone who has had some struggles in life and may not want a traditional Christmas card. I made two versions. One is sparkly, the other is slightly more masculine or rustic. Which one is your favourite?
Here is the one that is more rustic. The only difference is that the Be Dazzled paper is taken away. Small but significant detail.
Part of the pdf Tutorial
The purpose of my Cross Country Christmas Cookie Exchange Party with a Heart is three fold. First I want to unite stampers across the country with a recipe swap. Doesn’t that sound wonderful? Second, I want to give you LOTS of great ideas for Christmas cards and projects. Third, I want to raise money for heart health as a fellow demonstrator in Ontario lost her husband to a congenital heart defect. The hospital that tried to save his life is now conducting research to try and prevent more tragedies like this. Stampin’Up! has designated this specific hospital for the funds raised in Canada!! That makes my heart sing.
This card will also be a part of the pdf tutorial that is included in the class/event. You will get the Strong of Heart stamp set as well as the tutorial and there will be a Zoom party on November 26. More details are in this blog post. If you live in the States you can simply purchase the tutorial.
The tutorial will be finished at the latest by November 1, hopefully sooner. I now have all the projects completed, now I need to write it all up and take and edit the photos. Usually it takes at least a full day to write a tutorial, sometimes two! You can order yours here below by clicking on the PayPal button. When it is finished I will add it to my tutorial store on this blog.
Recipe Swap
To participate in the recipe swap you need to preregister for the class which includes the stamp set. Deadline to send out the recipes is November 13. That way we will get them in time to share and talk about at the Zoom party. Please use as your base either 4″ by 6″ kraft paper or crumb cake cardstock. Here is a picture of my recipe card.
To make it less daunting to write out so many recipe cards I am suggesting that you handwrite the front of the card and then print out the instructions and adhere them to the back of the card. Best of both worlds!! During the Zoom party I will demonstrate three of the projects from the pdf tutorial. I hope YOU can join me for this fun class. Thanks so much for joining me today, I hope you have a super weekend. Hugs from Holland!
Hello stampers and happy Wednesday to you. Transforming your paper with Blends is a very rewarding experience. Many of us love to colour and when you take your monochromatic paper and chop it up to a manageable size you are ready to transform it. That is what I did with my card for my private Prime Time group. I used the Peaceful Place paper to make this card.
Transforming Your Paper With Blends
At the heart of this technique is another practice called #loveitchopit. Truth be told, we often hoard our pretty paper. Experience has taught me that when I chop my paper I am much more likely to use it. The best measurements for chopping are 4″ x 12″ strips and then you can cut them into 4″ by 5 1/4″ for card fronts. This will leave some smaller strips that you can use in the inside of your cards.
The Paper as the Focal Point
I decided to turn this gorgeous paper into the focal point of this easel fold card. It looks great combined with Early Espresso and Old Olive cardstock. Transforming your paper is easy with Blends don’t you think?
The Finishing Touch
I added a few metallic dots and some linen thread for the sentiment. It was so much fun making this card and I am looking forward to doing a video tutorial with it for my Prime Time group on Thursday.
Follow Me on YouTube
Did you know that I do a weekly virtual coffee and a card class on YouTube? You can follow along even if you don’t order the kits to do it yourself with me. Each Tuesday morning at 10am EST I do the video. This past week I actually showed this colouring technique at the end. I’ll share the video here. Keep an eye out for the little red rectangle in the corner of my video. If you click on that you can subscribe to my channel and then you will be notified every time I post.
Busy Squirrel
Sometimes life gets a little hectic and then I drop a few things that I was super enthusiastic about. One of those things was my Parcels in the Post program. I hope to revive that very soon!! Another is stamp clubs. I miss my stamp clubs and am hoping to start them up again but on a virtual platform. Many people are not big fans of more technology so they stay away from Zoom. Did you know that you can also use Facebook rooms to get together. Maybe we will have a little play session to see how it works. Who is interested?
Thanks so much for joining me today. Happy stamping and have a super day!
Hello stampers and happy Monday to you. Today I have an adorable Post-It Note Holder for you. I love cute creations that have a useful purpose. Do you often write little notes on Post-It notes? This project will be part of the Cross-Country Christmas Cookie Exchange Party With a Heart and it will be included in my pdf tutorial as well. Let’s take a look!
My Favourite Part
My favourite part of this project was that I transformed a hideous neon Post-It Note pad into something really beautiful. I had no neutral sticky notepads in the house, only varying shades of neon! What did I do? I first started by sponging on some early espresso ink but this affect was too feeble. Instead I rubbed it directly on the ink pad with fabulous results. Then I cut out a piece of white cardstock the same size as the note pad and adhered it to the top.
Christmas Gifts
It’s the little things that count, and this pretty project could be a lovely gift for friends and coworkers. It folds down flat so you could even mail it! I have long been a fan of useful and pretty handmade gifts, and this Post-It Note Holder fits the bill. Be sure to subscribe to my YouTube channel and you won’t miss out on the Christmas videos that I will start posting after the pdf goes live on November 1.
Happy Thanksgiving Canadians
I am still in Holland and there are no brilliant fall colours here, so I decided to make a card using the Gorgeous Leaves bundle. You can see the video below. Due to some technical challenges I didn’t get good photos of the card today but I will share on Wednesday. I do share the Blends and alcohol technique which is easy to do if you use the right materials.
Thanks!
Thanks for joining me today. If you would like to purchase any of the materials I used, the supply list is linked below. Just click on the images and you will be in my online store! Have a super day!
Well, hello stampers and happy Friday to you! I am super excited to announce my Cross-Country Christmas Cookie Exchange Party With a Heart. Isn’t that a mouthful? There is a reason for the long name, so I will explain it to you.
Cross-Country
This part was super important to me because I love connecting people. We live in a large, beautiful and diverse country. In the past it was a lot of fun to have pen-pals, and now it will be fun to exchange favourite Christmas recipes. Wait…I thought you said cookie exchange Jackie?!
Cookie Exchange
Well, cookie exchange sounds a lot better than recipe swap which is what it will actually be. But….you can then use the recipes that you get and then do a real cookie swap with your local people. I have totally fallen in love with the Gingerbread & Peppermint suite and even though I am using it for a class at the end of October, I have decided to feature it for this event as well. You will see that I am planning to do a whole video series on this suite in November and there will be a pdf tutorial to go along with it.
Party With a Heart
This is where it gets super special. You see, not only are we going to have a wonderful time together, we are also going to contribute to heart health. How are we going to do that? Stampin’Up! has designed a special stamp set where they are giving $4 of each stamp set to heart health. It gets even better! Stampin’Up! Canada has chosen to donate to the London Health Sciences Centre which is just one hour away from me. The reason is very personal.
There is a fellow Canadian demonstrator, Anne Granger, who lives near London and she lost her husband at a very young age due to a rare heart disease. How touching that SU is now donating to the hospital that tried to save his life. With research, perhaps other people will not have to go through such a tragic loss.
Class Options
There are several options for participating in this class. Option one includes participation in the recipe card swap, the Strong of Heart stamp set and a pdf for all the Christmas projects. This is $55 including shipping.
Option two includes all of option one plus the What’s Cookin’ bundle. This is $110 including shipping.
The third option is pdf only but this does not include the recipe card swap. It is $20.
Every week in November I will be doing a video showing several different projects. On November 27 at noon EST we will celebrate with a Zoom party. I will demonstrate three projects from the pdf that day.
Please note that the projects that will be made with Strong of Heart are not yet designed as I am waiting for my stamp set here in the Netherlands. Here is a closeup of some of the projects.
The Second Best Part
The best part is perhaps the fact that we can have so much fun together while raising money for heart health. I really value the fact that SU chooses a local charity to support rather than all the funds raised going to the States.
The second best part is that included in this class is a swap. Not exactly a card swap but a recipe card swap. I will show you an example so that you can make your own beautiful 4″ by 6″ recipe card. If they are all the same size then we can make or find a beautiful box to put them all in. This is still under construction! Recipe cards need to mailed out no later than November 13.
Recipe Card
There are only two recipe cards in the Gingerbread & Peppermint memories and more cards so I thought it would be super simple and cute to make my own. Simply take a 4″ by 6″ piece of our new kraft paper and decorate it with a narrow strip of designer series paper and some stamped off stamps. That way they won’t cover up your writing!
This is one of my favourite Christmas cookie recipes. All of my grown children also make these cookies. I only bake them in December and that way they stay special.
Check out this post with some great Gingerbread cards.
Excited and Ready to Sign Up?
Of course you are!! Last year we had so much fun at my #itsallaboutthetreats event and this one is going to be bigger and better!! I am already excited about getting your recipe cards in the mail. What fun! This event combines the things that I love most about my life: people (aka you!), Stampin’Up! and baking.
Choose your option here but please remember that the pdf will not be available until November 1.
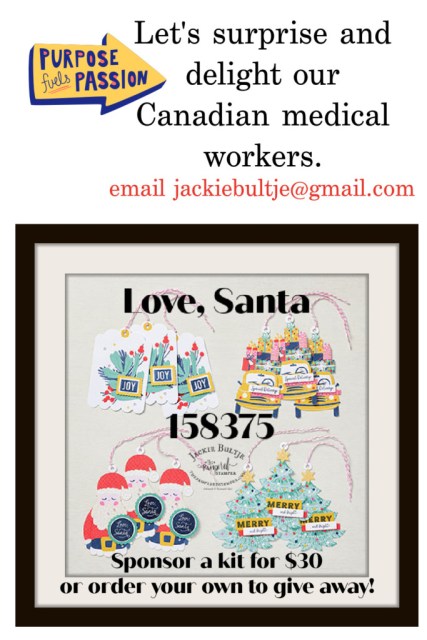
Hello stampers and happy Wednesday to you. Love, Santa is a brand new kit that has just been released and I wanted to share it with you. Do you know why? Mostly because I think it’s a super fun kit, but more importantly I am at 22% of my “fun-raiser” goal and I am hoping that YOU will also step up and join in. Let’s take a look at the kit.
Love, Santa Tag Kit
One of the wonderful things about preparing for the Christmas season is gathering around the table as a family and making things, whether it be cards, cookies, Christmas ornaments or tags. Great things happen around the kitchen table! This Love, Santa tag kit is perfect for creating with your kids or grandkids or with your friends. It’s also perfect to give to a stressed out teacher or health care worker!
What’s Included?
As you can see from the photo above, you get a clear block, a stamp set, an ink pad and supplies to make 12 beautiful tags. You can also use these tags as components for cards if you are not really into tags. Here is a look at the finished tags.
Cute Bags
Do you love giving little gifts at Christmas? Let me tell you a secret. Gift giving doesn’t have to be expensive. It truly is the thought that counts. If you make something yummy and package it up prettily, that can really mean a lot, both to you and the recipient. Check out these cute bags! When I get back home in Canada I will share my caramel corn recipe with you. That would be a perfect thing to put in these bags.
I just noticed that you can also use just one ordering number and get both the kit and the treat bags. Here it is for you!
How You Can Participate in the Fun-Raiser
There are several ways that you can participate in this “fun-raiser”. You can sponsor a kit for $30 and etransfer the money to jackiebultje@gmail.com or use PayPal. Another option is to order your own kit(s) through me online and have the pleasure of giving them yourself. The third option if you are a demonstrator is to organize your own fundraiser. Actually, there is a fourth choice. You can host a workshop at my studio or online. You can order a kit and invite a health care worker or teacher to come along and we can have a fun evening together.
Please be aware, this is still the same “fun-raiser”, I just changed the kit that we are giving since the other one sold out. Currently I am at 22% of my goal of 100 kits. Let’s do this! I usually post shopping links at the bottom of my blog, but they are not yet available so just click on the links in the text itself. If you see a blue word that means if you click on it, you will go to my online store. How awesome is that?
Thanks for joining me today and I hope you have a super day.


")


 Paper Pack")


")


")
 Specialty Designer Series Paper")


")
 Designer Series Paper")


 Mini Ruffled Ribbon")
 Diamond Weave Ribbon")