Hello stampers and happy Wednesday to you. Today I am going to share my five most viewed videos and I would like you to pick your favourite. The one with the most votes will get recreated with current products! I am excited to share this walk down memory lane with you. Can you believe that I have posted 593 video on YouTube? I think the oldest one is from 2017.
Video Number One: Faux Leather Technique
I have since done a new Faux Leather technique video, you can see that one here.
Video Number Two: Twisted Pop-Up Card Tutorial
Here is the link to an old blog post that features a different twisted pop-up card that has a nautical theme. I really do love this fancy fold card!
Video Number Three: Love it, Chop it
Here is the link to my blog post where I talk about the love it, chop it mentality and how it can really change how you use your paper!
Video Number Four: Super Quick Way to Mount Your Cling Stamp Sets
I need to add a disclaimer to this video. While this trick CAN save you a lot of time, sometimes there can be an error in the matching of the sticker sheet to the stamps. When this happens, there is no going back. You will not be able to take the stickers off after they are on. So look carefully before you begin to see if there are any discrepancies.
Video Number Five: Stamping on Embossing Folders
This one is a lot of fun. Today I am trying something new. I am spreading embossing paste on my card, letting it dry slightly, and then pressing the embossing folder into it. Stay tuned for how it turns out!
What do YOU Think?
Well, what’s the verdict? Which of these videos should recreate using current products? It sure is fun to see what was being used five or six years ago and how I have also changed!
I hope you have fun with this and I am looking forward to hearing from you what the verdict will be. Have a super day and happy stamping. Thanks for checking out my blog today.
Don’t Forget!
For the month of July you can earn Bonus Bucks. You get a $6 digital coupon for every $60 that you spend. You can redeem these coupons in August. It works out to 10% off which is nice.
Hello stampers and happy Monday to you. Today I have a Simple Emboss Resist card for you using the Circle Sayings stamp set. Find out how easy this technique is when you watch my YouTube video tutorial. The paper that I used for this card is an “online exclusive” called Simply Irresistibles. All the links for the products that I have used are found at the bottom of this blog post.
YouTube Video Tutorial for Simple Emboss Resist Card
Watch this video to see how this card was made. Emboss-resist is such a fun technique! If you haven’t already done so, please subscribe to my YouTube channel.
Free PDF Tutorial Bundle
If you spend $35 with me online or if you purchase the Circle Sayings stamp set, you will get a tutorial bundle featuring many cards using this stamp set. What a great way to get the most use out of your purchase!! If you want to see more emboss resist cards, click on this link. Happy stamping, and thanks so much for joining me today.
Stampin’ Up! is a company that specializes in the sale of paper crafting and stamping products. They offer a wide range of products and supplies for various creative projects. Some of the main product categories offered by Stampin’ Up! include:
Stamps
They provide a vast collection of rubber stamps and clear-mount stamps. These stamps come in various designs, themes, and sizes, and can be used for card making, scrapbooking, and other paper crafts.
Ink Pads
Stampin’ Up! offers high-quality ink pads in various colors and formulations, including Classic Stampin’ Pads, Stampin’ Write Markers, and Stampin’ Blends alcohol markers. These inks are designed to coordinate with their paper and other products.
Cardstock and Paper
They sell a wide assortment of cardstock and patterned paper in different colors, patterns, and finishes. This includes solid cardstock, designer series paper, specialty papers, and more.
Dies and Punches
Stampin’ Up! offers a range of dies and punches that enable precise and creative cutting or shaping of paper and cardstock. These products can be used with manual die-cutting machines or punch tools.
Embellishments
They provide various embellishments to add texture, dimension, and decorative elements to projects. This includes ribbons, twine, buttons, brads, sequins, enamel shapes, and other embellishments.
Tools and Accessories
Stampin’ Up! offers a variety of tools and accessories to enhance the crafting experience. This includes adhesive products, scissors, trimmers, embossing folders, heat tools, stamping platforms, and more.
Kits
They offer project kits that contain pre-designed materials and instructions for creating specific projects like cards, gift boxes, and home decor items. These kits are great for beginners or for those looking for quick and easy crafting options. You can see the Kits Collection here.
The European market sometimes has a different inventory of kits which you can see here.
It’s important to note that Stampin’ Up! regularly introduces new products and retires older ones, so their product offerings may evolve over time. It’s best to visit their official website or consult a Stampin’ Up! demonstrator for the most up-to-date information on their product range.
Can I order directly from Stampin Up?
Stampin’ Up! is a direct sales company and a member of the Direct Selling Association (DSA). Therefore, we allow customers to buy our products online through stampinup.com or through individual demonstrator websites.
Happy Tuesday stampers. Today I am going to share a gorgeous card in shades of blue with vellum embossing. To say that I love this card is an understatement. I used one of my all time favourite stamp sets, In The Moment. Would you like to see it??
Shades of Blue
This card was inspired by the gorgeous Countryside Inn paper which should be available again next week. It has many shades of blue and it reminds me of Delft Blue.
International Create With Us Tutorial Bundle Team
Here you can see who is all in our amazing Create With Us team. There are talented demonstrators from around the world including Artisan Design team members.
Here is a sneak peek so you can see the other submissions. If you want to purchase the tutorial you can do so here.
Don’t forget, if you place an online order of $60, you get this tutorial for free.
Can You Help Me?
Today I made a video explaining what Stampin’Up! is. There are still so many people who are not. familiar with this brand or with card making at all. If you could share this video, give it a thumbs up and leave a comment, then it will get more traction. Perhaps you haven’t subscribed to my channel yet yourself! Subscribing will help you know when I post a video, although I am super consistent. Every Monday, Tuesday, and Wednesday there is a video posted at 10am EST.
Perhaps you will even get a new stamping buddy by sharing this video on your own Facebook page!
Thanks!
Thanks for joining me today. Happy stamping, and remember, together we can change the world one card at a time. The links for the products that I used are found below, just click on them and you can shop with me in Canada. I’m deeply grateful for every order!!
Hello stampers. Wisteria Wishes really is WOW!! Take a look at the photo below and you will see what happens when you fall in love with a stamp set. To think that this bundle wasn’t even on my radar at first! The sad thing is, this bundle is retiring soon so be sure to get it before April 30. If you do, then you can come to my FREE Zoom class on May 17 at 1pm EST or 7pm European Central Time.
A Closer Look at Wisteria Wishes Cards
If you are like me, you will appreciate a closer look at some of the cards. My favourite thing in making these cards was making the wisteria blossoms out of watercolour paper that had been colour washed with Highland Heather and Gorgeous Grape. I did a short video tutorial on this technique and I will share that video in this blog as well.
Video Tutorial for Wisteria Blooms
Zoom Class on May 17
If you purchase the Wisteria Wishes bundle, then you get the Zoom Class on May 17 for FREE! I am very much looking forward to creating with you that day. You will also get a pdf tutorial along with this class. Please let me know if you have any questions. Live in Canada? Click on the links below to buy the products that you will need for this class. Live in Europe? Shop with me here!
Thanks for joining me today, I hope you have a super day!
Hello stampers and welcome to my blog! Today I am sharing what I call a bright vintage Queen Bee card. The feel is definitely vintage but the pop of Crushed Curry does make it a bit brighter than traditional vintage. This design is from Laura Milligan who also designed this stamp set as a Million Dollar Achiever. I loved making it!
Queen Bee Video Tutorial
A Few More Queen Bee Cards
I really do love the word “beloved” in this stamp set. I’ve used it in the background for my sympathy cards and that really tugs at my heartstrings.
For this square vintage card (it measures 4 1/4″ by 4 1/4″) I layered it with vellum cardstock, smoky slate and crushed curry cardstock. The details in the background come from Ranunculus Romance.
Colour Refresh
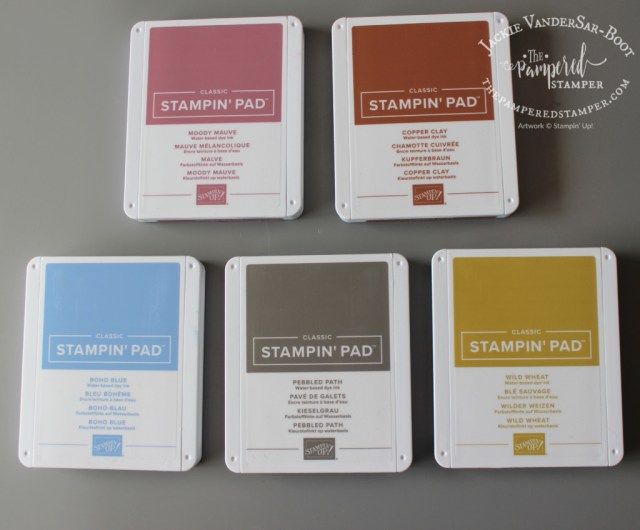
Today is the day that we find out about the colour refresh. My advice would be to order the ink refills and cardstock of the colours that you love that are leaving and do so as soon as possible. I am sure that some will sell out very quickly, so this is a time when you do not want to procrastinate!
Thanks for joining me today. As always, the products that I have used are listed below. A simple click on them, and you will be in my online store in Canada. If you live in Europe you can shop with me here or join my team.


")


 Designer Series Paper")


")


 Circle Punch")


")

 Designer Series Paper")


 Textured Ribbon")

")


")


")
 Gingham Ribbon")


 Designer Series Paper")


