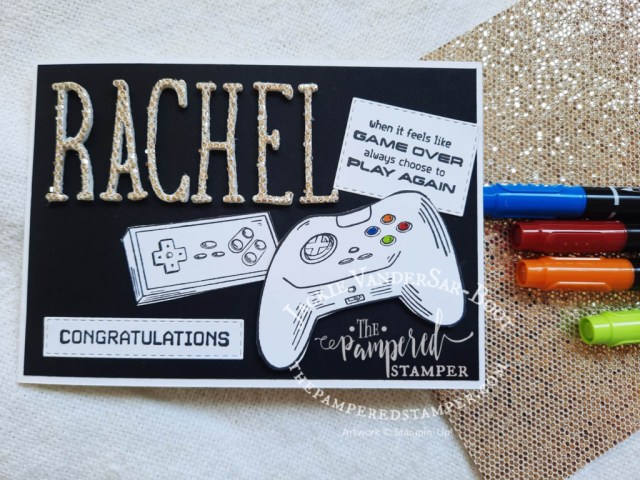
Hello stampers. Do you have any gamers in your life? This card would be great for any gamer!! I know very little about gaming, so I had to look up which colours I had to use to colour the controller!! This card was actually made for my daughter Rachel’s graduation from university! Isn’t that fun? Sometimes it is good to think outside the box. What would you use this stamp set for?
Rachel graduated after having to undergo more than two years of online courses due to COVID so the sayings in this set were particularly apt. If you want to see how I made the card, watch the video tutorial below. If you haven’t already, please subscribe to my YouTube channel.
Video Tutorial for Gamer Card
Think Outside the Box
I was quite happy that I decided to use this set for a graduation card. You really don’t need a “graduation” stamp set per se to make a graduation card. Just personalize your card to suit your recipient! Of course this set would also be great for birthday cards and other achievements. It was also very liberating to choose a black and white colour scheme. The sparkle from the More Dazzle paper keeps this card from being boring. Don’t you think it is a great card for gamers?
Do you have any gamers in your life that would be thrilled with a card like this? Perhaps you have a few who would be tickled to make their own cards or birthday invitations with this set. Have fun stamping!! It’s great to find things to do together as a family, and stamping and papercrafting might be just the thing for you.
Questions?
As your Stampin’Up! demonstrator, it is my job to answer your stamping questions and help you make the best choices for your hobby. Stamp sets are not cheap, so you want to choose the ones that will bring you the greatest joy and use.
Thanks for joining me today, I hope you have a super day. Happy stamping!!
Hello stampers and happy Thursday to you. Today I am sharing a gorgeously vibrant Tropical Leaf card. There are so many great watercolour tips to be gleaned from my video tutorial. Many thanks to Tami Hewlett for sharing her gorgeous card that inspired me! I hope that I inspire YOU to try this fun card!!
Tropical Leaf Bundle Card
If you want to enjoy a blast from the past, consider checking out this blog post from 2020 where I watercolour adorable rainboots.
Five Watercolour Tips and Tricks
Use either Fluid 100 watercolour paper from Stampin’Up! OR the retired Shimmery White cardstock for your background and your leaves.
Ink your leaves with three shades of green starting with the lightest shade. Spritz lightly with water and tilt your stamp so the colours run together a bit.
For the background ink up your E. block in Azure Afternoon and Tahitian Tide. Spritz lightly with water, let the colours run together a bit and press into your background layer.
If you have excess ink, absorb it with a piece of paper towel or toilet paper! It’s amazing how well this works!
When your background is dry, tap a water painter so that a few drops fall down. This gives a great effect.
Video Tutorial
For these types of watercolour tips, watching a video is always pure gold!! I hope you enjoy watching this amateur get some pretty awesome results. Trust me, I was very nervous to share this with you not knowing how it would turn out.
Inspiring Each Other
I am humbled and grateful at the inspiration that I gain from my fellow demonstrators. Without Tami Hewlett’s inspiration, I would never have made this card. I didn’t watch her video or even read her blog post, I just saw her card and started playing. Now I see that I used different ink colours than she did and the results are still fantastic. Where to you seek your inspiration?
My hope that when you see me trying new things, you will also feel empowered to do it as well. Creativity is so thrilling!! Have a super day, and please shop with me if you live in Canada or in Europe, your business keeps me going!!
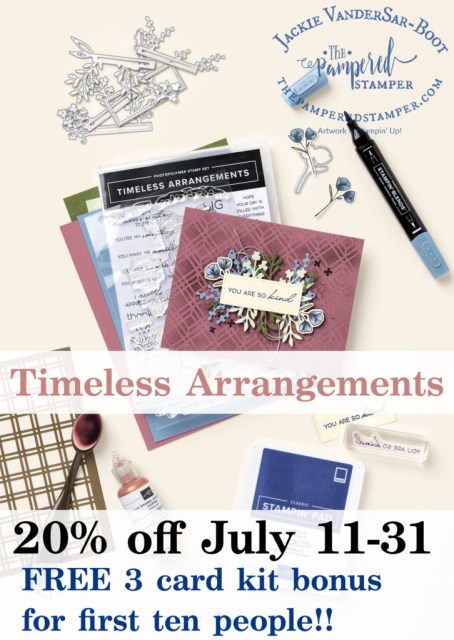
Hello stampers and happy Monday to you! Today I am sharing some Timeless Arrangements cards with you. I adore this bundle because it makes it SO easy to make “timeless arrangements”. The name of this stamp set is so fitting, because the cleverly designed dies make it so easy to make beautiful arrangements that are indeed “timeless”. They can be used for any occasion, at any time of the year. Let’s take a look!
Timeless Arrangements Cards
Truth be told, I went a little bit crazy when I started creating with this bundle. Not all the cards fit the colour scheme, but I think you will agree that they are pretty special!
Try something new! Click on the photo above and see what happens. If I did it right, and you live in Canada, then you should be “in” my webshop with all the products listed that I used for these cards. Let me know if it works!!
Great Deal in July!
Summer is often a slow month for stamping sales and I really, really want to earn the Mexico incentive trip, mostly for Gerard because he loves to scuba dive and hasn’t done it for years, but also because it is the hallmark for knowing that you are running your business well. I very much appreciate every order that comes my way!! Timeless Arrangements is my deal for July and you get 20% cash back of the catalog price if you order through me. If you would rather get a different incentive, you can also choose a package of embellishments sent to you in a pretty card, or a mystery box from my stash!!
More Inspiration
This is a monochromatic card that I made showing how versatile this bundle is.
Here is another favourite which was inspired by Amy Cook.
Video Tutorial
I always enjoy seeing a stamp set in action, so maybe you do too! Check out my video from last week and remember, each Tuesday in July will feature another Timeless Arrangements card. Live in Canada or Europe? Order your bundle today and get 20% cash back from the catalog price!!
Thanks!
Thanks for joining me today. If you enjoyed this post, please share on social media, that really helps me!! If you live in Canada, you can click on the images below if you want to order them through me. I appreciate you!! Have a super day.
Hello stampers and happy Friday. Today I am sharing a super fun technique with embossing paste. Did YOU know that Stampin’Up! sells embossing paste? My job as a Stampin’Up! demonstrator is to share with you all the hidden gems in our huge annual catalog. Even I forget sometimes about all the amazing products that we have. My embossing paste was hiding in the cupboard for a while too!
Amazing Embossing Paste Trick
A few days ago I created a post sharing my top five videos over the years. One of them was a technique that involved stamping on embossing folders. This inspired me to do something new with an embossing folder and I am sharing the result with you now. Are you curious?
What to do
First you cover your work surface with a piece of grid paper or computer paper. Put your card down and carefully spread embossing paste over your card front or cardstock layer using a palette knife. Set aside on a new clean surface. Clean your palette knife. If you don’t do this right away it will harden and dry making it difficult to clean.
Ink up your embossing folder, either side work for the exposed brick embossing folder. Press the embossing folder into the embossing paste surface of your card. Press down firmly and then carefully peel it away. Watch my video as seeing is believing!
Spritz the back of your cardstock with water so that it doesn’t end up curling. When your embossing paste is dry (this could take a few hours) press it down with a few punches stacked on top of each other. This helps flatten your card.
After the embossing paste is dry and the card is flattened you can add your other elements using either liquid adhesive or dimensionals.
Which is your favourite colour? Cherry cobbler, Pebbled Path or Copper Clay for the embossing paste embossed exposed brick wall?
Video Tutorial
Prime Time With The Pampered Stamper
This video was intended for my private Prime Time group. You can also join this group. It costs $30 for three months. What do you get? First you get a weekly exclusive video tutorial each Thursday at 10am EST. Each Wednesday I post the supply list as well as the dimensions of your paper pieces. Each month you get a free 15 card pdf tutorial which is worth from 15-20 dollars. You can see that your ten dollars a month is a true bargain. Click here to join.
Thanks so much for joining me on my blog today. I love being a Stampin’Up! demonstrator in both Canada and Europe. If you need one, you know where to find me! Have a super day.
Hello stampers and happy Wednesday to you. Today I am going to share my five most viewed videos and I would like you to pick your favourite. The one with the most votes will get recreated with current products! I am excited to share this walk down memory lane with you. Can you believe that I have posted 593 video on YouTube? I think the oldest one is from 2017.
Video Number One: Faux Leather Technique
I have since done a new Faux Leather technique video, you can see that one here.
Video Number Two: Twisted Pop-Up Card Tutorial
Here is the link to an old blog post that features a different twisted pop-up card that has a nautical theme. I really do love this fancy fold card!
Video Number Three: Love it, Chop it
Here is the link to my blog post where I talk about the love it, chop it mentality and how it can really change how you use your paper!
Video Number Four: Super Quick Way to Mount Your Cling Stamp Sets
I need to add a disclaimer to this video. While this trick CAN save you a lot of time, sometimes there can be an error in the matching of the sticker sheet to the stamps. When this happens, there is no going back. You will not be able to take the stickers off after they are on. So look carefully before you begin to see if there are any discrepancies.
Video Number Five: Stamping on Embossing Folders
This one is a lot of fun. Today I am trying something new. I am spreading embossing paste on my card, letting it dry slightly, and then pressing the embossing folder into it. Stay tuned for how it turns out!
What do YOU Think?
Well, what’s the verdict? Which of these videos should recreate using current products? It sure is fun to see what was being used five or six years ago and how I have also changed!
I hope you have fun with this and I am looking forward to hearing from you what the verdict will be. Have a super day and happy stamping. Thanks for checking out my blog today.
Don’t Forget!
For the month of July you can earn Bonus Bucks. You get a $6 digital coupon for every $60 that you spend. You can redeem these coupons in August. It works out to 10% off which is nice.