Hello stampers and happy Friday to you. Parcels in the Post is going mainstream! There is quite the story behind this decision and this is about the most excited that I have been since our engagement was announced. Let me tell you why.
The Challenge of Covid as a Small Business Owner
COVID19 is not over yet and it has been a time of struggle and triumph for people both individually but also as business owners and employees. For me it was hard to decide whether to focus on transforming my business or just helping people cope. I chose for the latter and started doing daily videos and making lots and lots of #kitsforkids. I have no regrets about doing this but after a few months I really had to start figuring out how to transform my business.
This was done in two main ways. The first thing I did was to create Prime Time with the Pampered Stamper which is a private Facebook group that costs $10 a month. My purpose with this group was to create an affordable avenue (less than the cost of one coffee and a card class!) where people could be part of a community. Each Thursday I do an exclusive video tutorial for this group. On Wednesday I post the supply list and dimensions. Each month there is a free 15 project pdf tutorial AND a prize drawing for a stamp set.
The second thing I did was create my Virtual Coffee and a Card class on YouTube. People can subscribe and get a card kit in the mail for $25. There is a card for each Tuesday of the month and at 10am EST I do a video tutorial. This is now going to change into something that is more sustainable and also gives much more value and room for creativity.
How to Gage the Success of a Program?
The struggle was in knowing when to stop with something that is not working the way you had hoped that it would. Backorders have been a problem and that causes delays in shipping the kits. Mail is also a bit unreliable, sometimes taking far longer than it should. Social media also can be a bit of a dragon lady. Posts are not always seen and it can be frustrating when you think you are getting a message out there but it really isn’t happening. People are also on a bit of social media overload.
Consistency is so important and I want my customers to feel that they are part of a solid, reliable business and not something that feels like shifting sand. We all miss our in person classes and hopefully they will once again be a part of our regular repertoire. I heartily encourage any local customers of mine to seek out my team members when I am in Holland. When you support them, you are also supporting me. We are a team!
Parcels In The Post
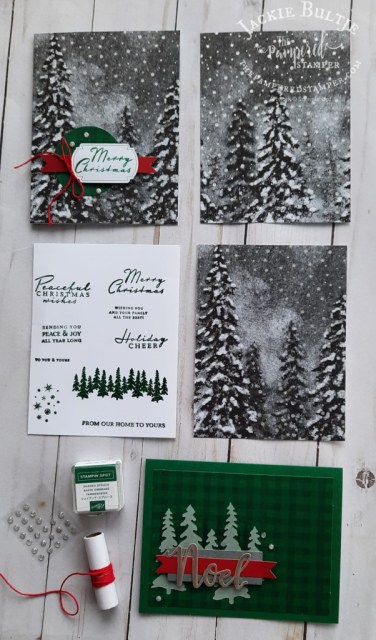
Virtual Coffee and a Card is being transitioned to Parcels in the Post. The price is the same. $25. Because there is more product in these parcels they will also weigh more and that means extra shipping costs. Local pickup will be $25, but if you need it mailed it will be $30. Included is ten sheets of cardstock in five colours, 12 sheets of dsp 6″ by 12″, at least four yards of ribbon and perhaps some embellishments. Each month it will be different. Kits will be available while supplies last.
Each Tuesday at 10am EST I will be doing a video showing you several projects made with this parcel. You can choose which ones you want to make. I hope to also have a pdf option in case you simply want to use your own materials. The first one is themed Peaceful Deer. Here is a photo. Please keep in mind that the black gingham ribbon is not pictured but IS included.
Projects with Peaceful Deer Parcels in the Post
If you would like to see the projects that I will be featuring in my videos in December with this parcel, you can watch this video. On Monday I will post pictures of the cards and bag. I am really excited about my Parcels in the Post going mainstream. By that I mean that it will be my prime focus. I had so much fun creating these projects and was inspired by many other talented demonstrators on Pinterest. It will be exciting to see how these affordable kits will help you be more creative. On Monday I will also include a list of the products that I am using to create my projects. You can then see which you already have and which you might want to order.
The Best Way to Order
The best way to order your supplies is of course with your very own discount. From now until November 30 you can get the starter kit for only $100 and you can put $165 worth of products in your kit. Perhaps the Parcels in the Post supply list will be perfect for your starter kit. Invite your friends to watch my Parcels in the Post videos and then they can order their supplies from YOU and then you will be able to keep your own discount and perhaps earn some income as well or at least get your own stamps for free. Dream big my friends! I would love to help you do just that.
Hello stampers and happy Wednesday to you. Today my post is about the Peaceful Christmas Paper Pumpkin. Like the name suggests it coordinates with our Peaceful Cabin suite in the holiday catalog. I am going to show you a way to get a LOT more bang for your buck with this kit and also why Paper Pumpkin is such a wonderful product to have on hand. Let me tell you a story.
Overheated Paper Pumpkin
I just spent a few days at my parents place and I am so very blessed to still have them with me and in their own home. However….staying with them requires that I have a summer wardrobe available ALL the time. They live in their kitchen and as they are elderly, they like the temperature to be very warm. Even in a lightweight summer dress with bare legs the sweat trickles down my neck. Menopause is not an easy taskmaster. Even my Paper Pumpkin was breaking out in a sweat!!
Seriously though, when I go visit my parents and I know that it will be more than 24 hours, I take a Paper Pumpkin with me. At the very least it gives me a creative escape to help take my focus away from the hot kitchen. At the best, I get creative time with my mom. This visit Pap was very sick and in a lot of pain and we spent a lot of time helping him. When this happens we play a lot of dice games that mom is super familiar with so that we can chat and catch up at the same time. I did bring out the Paper Pumpkin but she just watched me make the two sample cards and she asked some questions about what I would stamp in the inside. It was still a nice diversion for her and took her mind off the serious state of her husband’s health.
The Best Way
The best way to get your Paper Pumpkin is to start your subscription, unless you have a bunch of friends that also want to try it. If that is the case and you can get 7 coworkers or friends together THEN you should each get a one month subscription and some adhesive then you will also get some host benefits so you can get a free stamp set. Alternatively with only 3 people getting a 3 month pre-paid subscription you will also get host benefits. Check out your options here. I always get extra kits which you can purchase from me if you are local, but when you subscribe yourself you get a free clear block in your first kit and that is quite wonderful.
Paper Pumpkin is portable so you can take it with you whenever you know you are either going to have a long wait OR you can have some “me” time anywhere you go. It’s also a great way to share your hobby with your friends. So often I hear people moaning about wanting to lose weight and I am sometimes one of them. My theory? Keep your hands busy and your mind occupied and you will eat less!! Paper Pumpkin can be a dietary aid, who would have thought?
Lots of Inspiration!
Another great thing about Paper Pumpkin is that there is a huge group of people who share their ideas on Facebook in a group called Paper Pumpkin Fan Club. Here are a few ideas that I found there to help me have more fun with my kit. Sometimes I contribute my ideas there too, but this has been a month where I take rather than give creatively and that is ok.
I love these alternatives and you can read all about them here.
Here is a wonderful tag kit and holder.
Cindy made a beautiful little holder to go with it and you can read all about it here and watch her video so you can make your own.
Finally here is a great card that is made using the gorgeous envelopes in this Paper Pumpkin kit. You can find Sharon on Instagram here.
The Actual Cards in the Kit
Finally here are the cards in the kit that I made in my mother’s hot kitchen. Want to double your beautiful cards? Simply cut the cards in half, they have those gorgeous trees printed on both sides! Then you can simply mount them on a thick basic white card base.
As always, the cards are even nicer in person. On the green card you can’t even see that the trees are stamped behind the vellum trees for a lovely landscape effect. It’s also hard to see that the circle behind the tag is also a gorgeous plaid. Seeing is believing!
Another great benefit of Paper Pumpkin is that after you have completed your kit you still have the amazing stamp set, ink spot and extra accessories. You can start your subscription today by clicking here and remember, you can skip a month at any time with no penalty OR you can increase the number of kits that you get each month in case you need some for gifts or for an event such as a kids birthday party. What a great craft and activity idea!
Thanks for joining me today! Happy stamping and have a super day.
Hello stampers and happy Friday to you. Today I am sharing with you some absolutely adorable tea light holders using the Time of Giving bundle. Actually I only used the dies which are called Giving Gifts Dies. I am not going to write out the instructions because I shared those with my private Prime Time group. You are most welcome to join this group as well. It is only $10 a month and you get exclusive weekly video tutorials as well as a monthly pdf which is worth $15-20. The link to do that is here.
Let’s take a look at these adorable, easy to make tea light holders.
Tea Light Holders
I got the idea for these tea light holders from UK demonstrator Claire Ottaway. Her measurements are using A4 cardstock but at least you will get the idea of how it all works. If you choose to use 12 x 12 paper then you will be fine.
You can buy battery operated tea lights at the dollar store and with the vellum inserts, the glow is just beautiful. My best tip: be sure to add your vellum inserts BEFORE you put the holder together. It’s really tricky to do afterwards, trust me. The problem is that you get so excited that you want to put it together and then you realize after that you forgot the vellum. You really DO need the vellum though, it makes for a really nice glow. Good luck!
Here is the video from Claire. Thanks Claire for the fabulous inspiration.
More Inspiration
I originally bought this bundle because of the die with the Santa and his reindeer. Take a look at Cindy Brumbaugh’s lovely card. I don’t have time to case it today, so I thought I would just share her card and her blog address so she gets more traffic to her blog as well. Thanks so much Cindy for your lovely card idea.
Baking Gingerbread Cookies Today
Today I am trying a new recipe for gingerbread cookies. Tomorrow is my in person À la Carte Christmas class. I might have a few extra kits so message me if you want one. Ten card kit and a box for $35 plus shipping. Here is the link for the cookies. If the recipe is a good one I will share it in my Cross Country Christmas Cookie Exchange with a Heart.
I really hope that you check out this very fun class. You can send me your homemade recipe card to be included in my cookbook and you will support the Stampin’Up! effort to raise money for heart health with the Strong of Heart stamp set. I am hoping to meet lots of you in the Zoom gathering on November 27th at noon. You an also simply purchase the pdf for all the projects here.
Next week I hope to make the Gingerbread House in a live Facebook video, stay tuned for details. That project is not pictured in the photo but it IS included in the tutorial. Thanks for joining me and have a super day!!
Hello stampers and happy Wednesday to you. Today I am sharing my new Arctic Bears card series with you. I will be making one of these cards each Tuesday in November at 10am on YouTube and Facebook. You can purchase the card kit including shipping for only $25. If you order the bundle from me then you get the card kit for only $10 plus shipping. Let’s take a look.
Arctic Bears Card Series
What I love about these cards is that they are “all occasion”. They can be used as Christmas cards but they don’t have to be. Polar bears evoke a sense of calm and peace and of caring which is sort of ironic because you certainly wouldn’t want to cross their path in the wild!
Arctic Bears Watercolour
We made the watercolour card that I cased from the catalog at my in person coffee and a card class today. With the shimmery white cardstock base and a water painter, the results were so lovely! I hope you can join me as I make this card in my Virtual Coffee and a Card series next Tuesday at 10am on YouTube. You can check out my playlist here.
Creating a scene with the stamp set is so gratifying. The watercolour technique on shimmery white cardstock is quite simple with a few tips and tricks that I will share on Tuesday. I hope to see you there too!
Have You Chosen Your Christmas Card Design Yet?
I am curious. When you make your Christmas cards, do you choose a single design or a single stamp set or suite? Do you send cards only to very special people or do you have a long mailing list? I do not like making multiples of cards so I have a broad assortment of Christmas cards. This can get me into a bit of a sticky wicket. Sometimes I am plagued by indecision. Who should get which card? So many choices. The most important thing is that you enjoy the process, so be sure to start on time. I hope that I have been inspiring you. As always, the product list is at the bottom of the blog. Simply click on the photos and you will be in my online store. Wonderful, isn’t it?
Thank you for joining me today and have a super day.
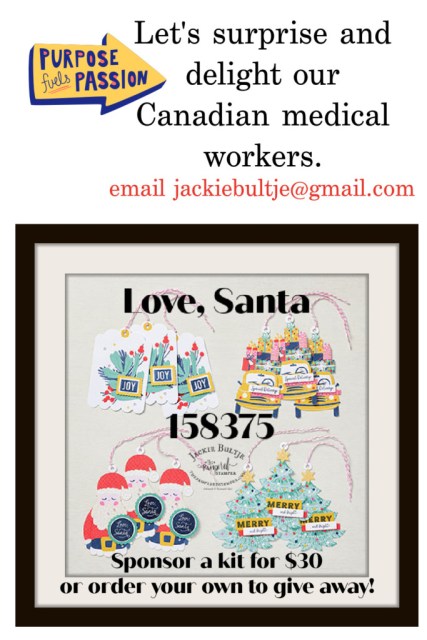
Hello stampers and happy Tuesday to you. There is going to be a big sale tomorrow! 15% off of ALL red rubber cling stamps in the annual catalog except for host sets. I am hoping to use this sale to get more kits into the hands of health care workers and teachers! This is how!
Take Advantage and Give!
You can take advantage of the sale and by doing so I will get host benefits. I am going to use ALL the host benefits AND my commission on more kits for our teachers and health care workers. Hopefully you will also add a kit to your order to give to one of these front line workers as well. Together we CAN make a difference.
When you place your online order please use this host code so that I can use my host benefits to get more kits for the teachers and health care workers. Don’t need anything yourself? You can sponsor one or more kits by sending me your $$ via etransfer to [email protected] or through PayPal with the friends and family option.
More Good News!
I worked my tail off to get this huge 16 project pdf tutorial done before I fly home. So happy to tell you I did it! It’s finished and it’s fabulous. Perhaps you would like a copy? This tutorial gives you clear instructions and photos of lots of Christmas boxes, treat holders, cards and even a gingerbread house. It includes a link to a Zoom party on Saturday November 27 where I will demonstrate three of the projects: the gingerbread house, the spinning tower card and the Post-It note holder.
The house is not in this picture because I had to return it to Mardette and I didn’t have the Lots of Snowflakes dies here to make the trimmings for the house. You can see it in this blog post.
If you wish to purchase the tutorial, you can do so here.
“Fun-Raiser” Update
We are now at 26 kits sponsored and that is wonderful. I did a video yesterday showing the Love, Santa kit and explaining that my fellow demonstrator Tamara Bertram sold 75 kits. She lives in Edmonton, Alberta and there has always been rivalry between western Canada and the “east”. Funny how Ontario is in the middle of Canada but is considered to be “east”. Let’s show what we can do together! I would be over the moon to reach my initial goal of 100 but even 75 would be pretty awesome.
Instead of sponsoring a kit for $30, you can now sponsor TWO kits for $40. Two at a time we will reach our goal more quickly. Can I count on YOU to help??
Video of the Love, Santa Kit
Goodbye from Holland
Tomorrow will be my last day here, so no blog post. That is why I am writing one today. Thanks again for joining me, I hope you have a super day. Happy stamping.
Hello stampers and happy Monday to you. Today I have an adorable Milk Carton Gift Box for you. This project will be part of my Cross-Country Cookie Exchange Party With a Heart event and will thus be in the huge pdf tutorial that is a part of this class. Everyone who purchases the tutorial is welcome to send me a recipe card that I will include in my recipe book for Christmas. I am hoping that everyone will also purchase the Strong of Heart stamp set (the heart part of this event) as it is a Stampin’Up! fundraiser for heart health.
Milk Carton Gift Box
Here is the adorable Milk Carton Gift Box. No worries, all the dimensions and directions will be in the pdf for you which is chock full of great Christmas ideas. I will also be doing some videos of these projects on YouTube in November.
PDF Tutorial
I am thrilled to say that I am over half way with this massive pdf tutorial. This will be a classic that you turn to again and again I think. Print it off and put it in clear folders and in a binder so you can reuse it without wearing it out! The promise was to have the tutorial done by November 1 but I am working hard to get it finished before I fly home to Canada on Thursday. Thank you to everyone who has already purchased it sight unseen. I am ever so grateful.
Joining in on the Fun
There are several ways that you can join in on the fun.
You can simply purchase the tutorial. This option is especially for those who are not in the Canadian market so they can’t buy SU products from me. With this option you can still send me a recipe card and I will share it on my blog and in my book. You also get to join in on the Zoom party on November 27 at noon EST.
2.You can get the tutorial and the Strong of Heart stamp set for $55 using the PayPal button. This is meant for people who don’t like online ordering but can manage this option. I will send you your stamp set in the mail. You get all the perks of option one.
3. You can place an online order for $55 and you will get the pdf tutorial for FREE. This is actually the most bang for your buck and is meant for those who can order online with ease. Please do remember to use the current host code which is always on the right hand side of my blog’s home page.
Exclusive Baking Class Option
4. This option comes with a very special bonus. If you purchase the Strong of Heart stamp set and other products for $100 or more you get to join me for an exclusive baking class in my kitchen (either in person or via Zoom) This will be on Monday November 28 at 10am EST. You can also choose option three in the PayPal button.
Flying Home on Thursday
It’s hard to believe that my time here is almost up again. Thursday I fly home to my family and that is wonderful too. Needless to say, I am going to miss Gerard a lot.
Thank you!
I am always so grateful when I see who comes by and reads my blog. Thank you for pinning my projects to Pinterest and taking the time to comment here. Blogging is meant to be a social activity, a community thing, not a solitary endeavour. It is more rewarding than you will ever know when you reach out to me with your own stories or experiences. I hope you have a super day. As always, the links are listed below if you want to purchase any of the supplies that I used today.


")


 Gingham Ribbon")
 Mini Ruffled Ribbon")

 Shimmer Ribbon")


")


")


 Open Weave Ribbon")


")


 Host Designer Series Paper")


")
")

")


")


 Paper Pack")


 Designer Series Paper")

